
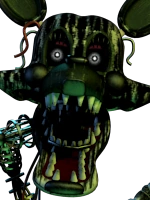
|
VentureSonic's page One Night of Everything: Ultimate Custom Night is owned by VentureSonic, meaning only he can edit it unless it has the Public template. Note that most of these pages might be neglected by Venture. |

|
One Night of Everything: Ultimate Custom Night is public, meaning you can edit the page to add content that the creator finds acceptable. However, rules on vandalism or editing other people's work without permission still apply. If the creator of the page offers any rules about editing their page, follow them. |
- This page may be public, but you're NOT allowed to work on the canon FNaF characters without my permission. This doesn't include presets that include the characters, however, or grammatical corrections.
One Night of Everything: Ultimate Custom Night is the supposed finale to the One Night of Everything series. This game is a huge custom night featuring several presets.
Notes[]
- Don't edit anything made by other people. You may only add your own categories.
- If you're struggling on where to put animatronics, use the Spare Rooms! It doesn't really matter if animatronics are already there as the cameras will deactivate.
- If you can't make your table look good, don't worry. I'll try and touch it up.
- Use notes (as in on the table) if you have anything specific to enquire about.
Story[]
After William Afton beat 50/20 mode in Ultimate Custom Night, Satan decided to send him here to prove his skill, and just for the devil's entertainment.
Location[]
The location is a mish-mash of all the Five Nights at Freddy's locations bundled into one, perfect for all the animatronics.
Characters[]
Five Nights at Freddy's[]
| Image | Character | Description |
|---|---|---|

|
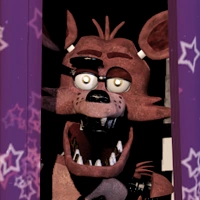
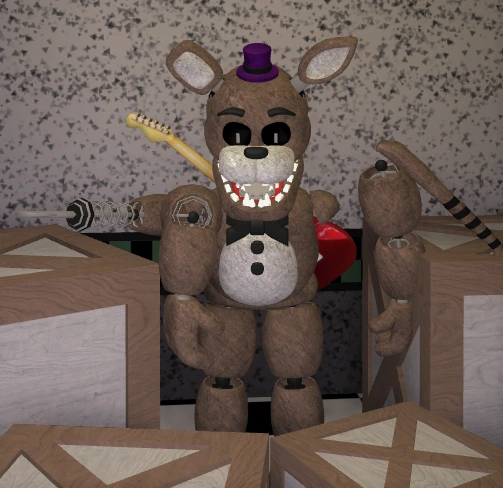
Freddy Fazbear | Freddy is the star of the show and name of the game. He stands at his starting spot, the Classic Show Stage. He'll make his way towards the Right Hall and stalk you until you're vulnerable. Keep your ears out for his nasty laugh. |

|
Bonnie the Rabbit | Bonnie is the loyal bandmate with a strive on the guitar. Once he's done tuning his instrument on the Classic Show Stage, he'll make his way through the Left Hall looking for you. If he appears at that door, you better shut it! |

|
Chica the Chicken | Chica is the secondary singer of the band. While she loves to spend time in the Kitchen, she'll start at the Show Stage. She'll go through the Right Hall, and try to go through your door. If she fails, she'll reside in the Kitchen, awaiting her time to strike again. |

|
Foxy the Pirate Fox | The pirate swings his hook, as Foxy will snap his sharp teeth at you. On his stage in the Ship's Cove, he'll eventually dash down to your office after a certain amount of time. Make sure to close one of the doors, and keep out for his foot steps. You don't know which one he'll go down! |

|
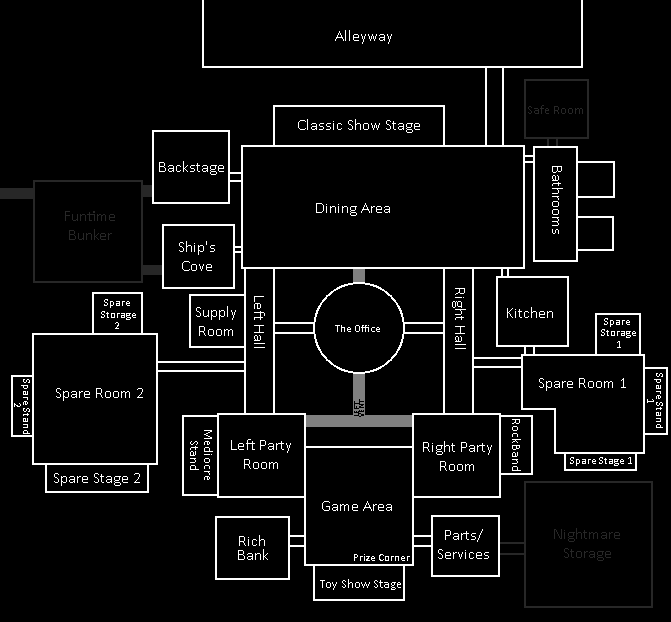
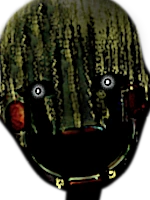
Golden Freddy | It's him. Golden Freddy's residence is unknown, but his face can be seen on one of the posters found throughout all of the rooms. He'll appear in your office, and if you don't deter him with your camera, you'll get the bite. |

|
Endo-01 | A bare endoskeleton in the Backstage. He'll sneak throughout the rooms, only moving certain objects along his way to let you know he's there. You won't see him coming through those blind spots, so you better make sure you're paying attention to which hall he'll come through. |

|
Phone Guy | Ring ring, ring ring! Hello! Hello! Those noises will drive you mad and drive animatronics closer to your room. Shut that phone up by pressing the Mute Call button as normal! (or press E if you're lame) |
Five Nights at Freddy's 2[]
| Image | Character | Description |
|---|---|---|

|
Toy Freddy | He's back from retirement, giving up games as a hobby. Toy Freddy of the Toy Show Stage is really hidden in his camera placement. After the Game Area, who knows where he went! Most likely, the left door. You might even hear him play his tune. |

|
Toy Bonnie | The leapster Toy Bonnie returns to bring back the good memories. He'll hop from the Toy Show Stage all the way towards the Right Vent. His scanners are still outta wack, so using the mask should be good enough! |

|
Toy Chica | Toy Chica is packing the heat in...certain ways. While animatronics will slow down for her in the Game Area, once she makes it through that Left Vent, you might be beat. That Freddy Mask comes in handy, as Old Freddy isn't really her thing. |

|
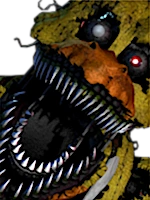
Mangle | That screech belongs to Mangle! She/he lurks in the Ship Cove before heading to your Office. You'll hear him/her screech through the Right Vent, so use that mask well. She/he'll be detracted, and will head back to her/his Cove. |

|
Balloon Boy | Hi? Hello! Hahaha, you better watch out for the kid with a balloon. Balloon Boy (everyone's favourite) will start in the Game Area, waiting to come out to play. If he finds his way into your Office, your lights will no longer work. That...might be important. |

|
JJ | Ever heard of privacy, lady?! This little freak will sometimes appear under your desk just to taunt you, but don't keep her there, or else she'll pop out and deactivate your doors. Getting rid of her is simple; simply click on her when she's under the desk. |

|
The Puppet | The Prize Corner calls for you. The music box is a ticking time bomb; if you keep it wound up, you and that Marionette will get along just fine, but if it ends, the Puppet will go out to kill you. No protection against this beast when it's out! Every bear for himself! |

|
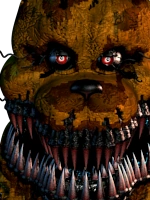
Withered Freddy | The ol' Fazbear has been through his own scrap. Despite his torn fur, he'll keep up his act. As one of the only animatronics to be unaffected by the doors, the only way to take him away is to make him look in a mirror. Put on your mask to deter him. |
|
Withered Bonnie | Without a mask to hide this rabbit's evil intentions, Bonnie is back with rage. Like his old bandmates, he's left in Parts/Services. He'll go through the Left Vent with the sole intention of getting a new face. He doesn't accept Freddy's, however, so use the mask! |

|
Withered Chica | What happened to Chica? Honest question, we don't know. Withered Chica will take the long way from the Parts/Services room all the way to the Right Vent just to take you out. Using the Freddy mask will deter her, but that won't keep her away for long! |

|
Withered Foxy | No bars held, this is a dangerous fox. Watch as he dashes from Parts/Services to your Office in seconds before ending your miserable life. Unless you use your flashlight. For some reason, Foxy absolutely HATES being flashed. |

|
Withered Golden Freddy | Pay attention to your desk, as this yellow bear will appear beside it and freak you out. Use the Freddy Mask to deter him, but if he appears at the doors, DON'T CLOSE THEM. The mask is the only thing that'll stop his head. |

|
Endo-02 | Endo-02 will pop out of the Music Box if necessary. He'll crawl through any vent he can see without any warning in those blindspots. If you don't put on the mask WHILE he's in the vent, you'll be jumpscared! |

|
Shadow Freddy | Be wary of your surroundings. If Shadow Freddy is seen in a camera for an extended period of time, he'll crash your tablet, causing it to force a reboot. This is dangerous considering your mission. |

|
RWQFSFASXC | You're not even safe in that Office. This shadowy Bonnie can appear on any wall without warning. Staring at him for too long will instantly drop your oxygen down to 0, causing extremely vivid hallucinations. |
Five Nights at Freddy's 3[]
| Image | Character | Description |
|---|---|---|

|
Springtrap | He is still here. Springtrap resides in the safe room, awaiting his time to strike. He'll go nearly everywhere, and go through both doors. He also tries to tamper with the Oxygen Machine, trying to awaken the spirits. |

|
Phantom Freddy | Phantom Freddy limps across your room suddenly. You have to click his nose to stop him. However, if you fail to do that, Phantom Freddy will jumpscare you, causing your Oxygen to drop significantly. |

|
Phantom Chica | Is that a watermelon? Phantom Chica's face can be seen in the Game Area's arcade cabinet, where if you watch it for too long Phantom Chica will jumpscare you, causing your Oxygen to drop significantly. |
|
Phantom Foxy | Bringing back the pirate motif, Phantom Foxy will randomly appear in your Office without warning. If you stare at him for too long, he'll jumpscare you and cause your Oxygen to drop significantly. Using the camera will get rid of him. |
|
Phantom Mangle | Phantom Mangle can randomly appear in Ship's Cove, which will cause her/him to appear at the top of your Office, screeching. After a while, he/she'll jumpscare you instantly, which drops your Oxygen. |

|
Phantom BB | Those laughs get more demonic, especially if you see Phantom BB randomly on a camera. If you stare at him for too long, he'll appear infront of you just to jumpscare you, dropping your Oxygen drastically. |
|
Phantom Puppet | Be careful when winding the Prize Corner's music box. If you see Phantom Puppet there, you'll be severely troubled by them staring at you up close while slowly draining your Oxygen. |
Five Nights at Freddy's 4[]
| Image | Character | Description | Notes |
|---|---|---|---|
|
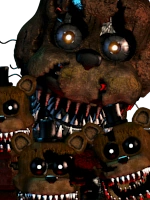
Nightmare Freddy | The more the merrier, huh? Freddles will slowly crawl through the Left Vent (essentially like your Bed), and the more they build up, the more at risk you are of Nightmare Freddy. Flashing the light in the vents usually stops them. | |
|
Nightmare Bonnie | This nightmarish rabbit will start in the Nightmare Storage for good reason. This one ain't playing around, as he will screech and scratch as he slinks towards your left door. You won't see him coming through the blindspot, so shut the door when you can. | Can be changed to Jack-O-Bonnie. |
|
Nightmare Chica | The tag-team duo of chicken and accessory. She starts in the Nightmare Storage, but eventually, she'll scratch her way towards the right door. She won't appear in the blindspot, but you'll hear her approach. Shut the door if you hear her, or else she'll send out the cupcake. | Can be changed to Jack-O-Chica. |

|
Nightmare Foxy | Nightmare Foxy will slowly appear from under the desk. If you don't flash your flashlight at him, he'll jump out and jumpscare you. No closet? The desk will do, I guess, huh? | |

|
Nightmare Mangle | Nightmare Mangle will slink around from the Nightmare Storage. She makes a lot of noise as she moves around, but she can't be seen on the cameras. You can only tell her position by sound. If you hear her coming through the doors, shut them. | |

|
Plushtrap | This finger-biting freak will move from the Prize Corner to your vents. If you flash the light down the vent, Plushtrap will scutter off, but try the other vent afterwards. Don't let him bite you! It won't hurt, but it still counts as a Game Over. | |

|
Nightmare BB | The most demonic BB you'll get. He starts in the Nightmare Storage and will find any way to slink into your Office by the doors. If he gets in, the doors will no longer work. | |
|
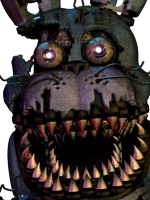
Nightmare Fredbear | The stomach-eating Nightmare Fredbear returns for one final battle. Coming from Nightmare Storage, Nightmare Fredbear is an unpredictable beast that will go through any door. | |
|
Nightmare | The shadowy mysterious Nightmare returns for the final bite. Coming from nowhere, Nightmare is even MORE unpredictable than his golden counterpart, and will teleport around sometimes. | |

|
Nightmarionne | A stringless beast that goes anywhere and is always thinking. The Music Box that can be played lures Nightmarionne away from your Office, which it'll ALWAYS enter, no matter the state of the doors. |
FNaF World[]
| Image | Character | Description |
|---|---|---|

|
Adventure Endo-01 | This little endo will sneak his way into the pizzeria and use his Endo Army to invade your Oxygen. The endos will appear in the Right Hall and shoot at your Oxygen, lowering it. Don't worry, shutting the right door scares them off! |

|
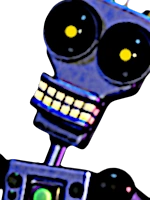
Endoplush | Endoplush remains dormant on your Office table until being awoken. When Endoplush is awoken, he will randomly open and close doors, draining some power. To stop him, click one of his eyes to put him back to sleep. |

|
Adventure Fredbear | Fredbear is a support character. He gives you info on animatronic whereabouts with the exchange of attracting them more due to his annoying voice. Oh, and the occasional one-liner on how this game is stupid and impossible. |

|
Deedee | Deedee is a one-time support mechanic. In the Game Area is the arcade cabinet for Deedee's Fishing World. You can click on it once to make the game start up, attracting animatronics like former-gamer Toy Freddy. This is only for one use, however. |
|
Mendo | Mendo is a one-time support character. He stays in the Office and offers to fix your cameras, doors, vents and oxygen in one quick move. However, this can only be done once, so use it in that one dire situation where everyone is on top of you! |

|
Old Man Consqeuences | If Deedee's game ends (or if Deedee straight up isn't active), Old Man Consequences will appear on her arcade cabinet. His purpose is unknown, but it apparently causes the animatronics to randomly get more aggressive or passive. |
Five Nights at Freddy's: Sister Location[]
| Image | Character | Description |
|---|---|---|

|
Circus Baby | Baby is quite the quiet one. You'll never hear her slink around or even see her, but if you don't see her coming, she'll jumpscare you without warning. From either hall, the ringleader will try to find her way into your Office. |

|
Bidybab |
Sneaking through your vent from locations unknown, Bidybab will go through a two-stage process in your vent before jumpscaring you. Administer a controlled shock to stop them, or else. |

|
Ballora | Ballora will find you inside your walls. She plays music in her halls. Use this to find out which hall she's coming from, as her presence disables both cameras while she's in the halls. If you fail to do so, you'll face the music. |

|
Minireenas | Ballora's little helpers are a pain to deal with. While they have a tendency to roam the halls, they actually don't jumpscare you. However, they will tamper with your Oxygen, so to get rid of them, you'll have to shock them. They can crawl on your face as well; to stop this, use the mask. |

|
Funtime Freddy & Bon-Bon | The dynamic duo is back for Round 3! While Funtime Freddy will approach you from the doors, he might deploy his trusty Bonnie Puppet to get you through the vents. Close the doors to stop Freddy and shock the vents to stop Bon-Bon! |

|
Funtime Foxy | She/he's back with a vengeance. She/he resides in the Ship's Cove where he/she also hides in the curtains. After finally coming out, he/she'll rush through your Right Vent, where you must shock him/her before he/she comes in. |
|
Yenndo | This mysterious endo popped outta nowhere, looking a lot like Funtime Freddy too! If you see him appear in your Office, quickly put up the camera to avoid him, or else he'll jumpscare you. |

|
Lolbit | LOL. JK. Lolbit will appear on one of the monitors on your desk. If you don't stop them, they'll block your vision and your cameras won't display any image. Type in LOL to stop this. That simple, SMH. |

|
Bonnet | This mysterious puppet appears in your Office and walks by. If you don't tap her nose, she will finish her loop around and jumpscare you. Tapping her nose will make her fall away and come back another day. |

|
Electrobab | If you keep the camera up for too long, Electrobab will quickly sneak into your Office and zap your camera into a state of not working. It'll restart shortly after, but it's quite an annoyance. What a brat, huh? |

|
Ennard | The cluster of the funtimes you had. He'll go nearly anywhere necessary just to rip out your innards and take their place. Controlled shocks and closed doors are the only things that can prevent this abomination from brutally murdering you. |

|
HandUnit | Your trusty companion Handyman's Robotics and Unit Repair Model 5, or simply HandUnit, will flip up with a prompt about your name or preference of reward. This makes audio and attracts animatronics though, so shut it down quick! |
Freddy Fazbear's Pizzeria Simulator[]
| Image | Character | Description |
|---|---|---|

|
Helpy | When flipping your camera down, Helpy can randomly appear on your office desk. If he's there, you click on his nose to make him run off, or else he'll 'jumpscare' you with an air horn, causing a lot of audio. |
|
Scrap Baby | The remains of Circus Baby crawls into your salvaged pizzeria. She comes in from the Alleyway and will try to crawl through your vents. To stop her, you better administer a controlled shock to that vent. Fail to do so, and she'll show you how her claw works. |
|
Molten Freddy | Round two, at least for this cluster. The remnants of Ennard will limp its way into your Office through the Alleyway. He's the slowest of the Salvaged Animatronics and will make his way into your Office through the vents. The controlled shock will stop him. |
|
William Afton/
Scraptrap |
You may not recognize him at first, but I assure you: he's still here. Through the Alleyway, Scraptrap will find his way into the pizzeria and will try to get at you through the doors. He tries to tamper with the oxygen like his Fazbear Fright counterpart. |

|
Lefty | The real trap is L.E.F.T.E. Lefty will appear from nowhere and will try to find a way into the Office, so you gotta lure it away from killing you. The Music Box will remind Lefty of its former self, and it'll go towards it. |
|
Bucket Bob | Bucket Bob starts in the Alleyway, hidden in the trash with the gang. When he gets up, he'll go through the pizzeria to go through the right vent. Though he might sleuth about in the Kitchen or Restrooms. Use the Freddy Head to trick Bucket Bob into not damaging your ears. |
| Mr. Can-do | There's a trash can in Backstage, but be careful: it's Mr. Can-do in disguise! Once his balloon head sprouts, he'll head towards the Office through the vents. Use the Freddy Head to deter him, or else he'll create an audio disturbance. His drawn face isn't very accurate with vision or jumpscares, though. | |
| Mr. Hugs | The star of Toy Freddy's favorite game returns! Mr. Hugs is tucked away in the Supply Closet. However, he'll eventually start moving towards you slowly. He won't appear in the blindspot of the Left Door, so shut the door once you hear his vacuum, or expect a loud auditory disturbance! | |
| No. 1 Crate | No. 1 Crate will sneak into your Office without any known starting location. When they get into your Office, they'll stay for a while and cheer the animatronics on. This will cause animatronics to get closer to your Office! | |
| Pan Stan | He's the leader of the bunch, and he's finally back. He starts within the trash in the Alleyway, before quickly starting his journey to your Office. He doesn't spend too much time messing around, so use the Freddy Head to trick Pan Stan if he gets in through the vents. | |
| Happy Frog | The happiest hip-hopping frog around! She'll start on the Mediocre Stand, and will start moving towards your Office from the Left Hall. The door should work wonders against this toad, but if she slips through she will jumpscare you. | |
| Mr. Hippo | A professional purple hippo with a love for your left vent. He'll go through the vent in the Left Party Room, or the Right Party Room after going through the Game Area. Using the mask will stop Mr. Hippo's jumpscare and long stories. | |
| Pigpatch | Pigpatch (no, not Porkpatch, completely different.) will slink through the Game Area once off of the Mediocre Stand. He'll try to go through the Right Hall to trick you, and if that fails...he'll just go around to the Left Hall and back to the Left Party Room. Use the door, y'know. | |
| Nedd Bear | Unlike the rest of his mediocre pals, Nedd does not appear in the blindspots of the doors. Nedd will try to go through the Left or Right Halls, and through the doors without you noticing. Don't let him in, or else he'll jumpscare you. | |
| Orville Elephant | The hardest Mediocre Melodies animatronic to deal with, but he's still quite...mediocre. Orville Elephant slinks from his Mediocre Stand and tries to head through your vents. He won't appear in the blindspots of the vents, so be careful and put your mask on with care. | |
| Rockstar Freddy | Freddy's feeling like a rockstar tonight! He resides in the Rock Band, awaiting his time to strike at you from the Right Hall. The door should be enough to stop his metal pestering. However, he might go through the Left Hall to switch it up. | |
| Rockstar Bonnie | We knew the rabbit would come back, but the real veteran is his guitar. Rockstar Bonnie starts in the Rock Band and makes his way to the Left Hall or to the Left Vent. Close the door if he tries the door, and shock the vent if he tries, well, the vent. | |
| Rockstar Chica | Let's Rock! Rockstar Chica starts in the Rock Band and makes her way to go through the Right Hall or Right Vent. You won't see her coming, but you might hear her maracas in her approach. That's your cue to shock her in the vent or close the door. | |
| Rockstar Foxy | Rockstar Foxy starts from the Rock Band by sending out his parrot into your Office. If you don't click the parrot in time, Rockstar Foxy will instantly rush into your Office and jumpscare you, just like that. | |
| Music Man | He is behind you at all times, and he's sound activated too! If there's constant noise in your Office, Music Man will slowly become more active, and you can tell when it happens because he clashes his cymbals together faster and faster, eventually ending your run once it gets too loud. | |
| El Chip | El Chip will stay in the Rich Bank before finding his way into your Office without any prevention. He isn't here to kill you though, he'll merely play on his strings for a bit, just to cause some audio disturbance. It's hard to concentrate when he stays. | |
| Funtime Chica | Time to Party! Funtime Chica is back from her party world to force you into her photo shoot. She appears in the Rich Bank, and somehow makes her way into the Office to distract you. Be careful and keep focus! | |
| Security Puppet | This is a one-use support animatronic that appears as a music box in your room. When the night is getting too stressful, click the box to cause Security Puppet to make everyone go away from your Office! You can only use it once, so use it well! | |
| Candy Cadet | Candy Cadet will try and scoot his way into your Office from an unpredictable location. If he makes his way in, he'll tell you a story, making a huge auditory disturbance, attracting nearby animatronics. |
Ultimate Custom Night[]
| Image | Character | Description |
|---|---|---|

|
XOR | This shadowy version of Deedee doesn't care about your perfect night. If she's on, she'll drag another foe into the night. Sometimes without warning, she'll activate herself despite not being active! |
|
Fredbear | It's him, the one who brought it all together. This restless soul will randomly appear, teleporting all across this pizzeria. He's the animatronic XOR's likely to bring up. All he wants is revenge, as he is the one you should not have killed. |
Extended Canon (VentureSonic)[]
| Image | Character | Description |
|---|---|---|
| Metal Freddy | Metal Freddy is a clone of Freddy, but much more aggressive than his brown counterpart. He appears out of nowhere in the Dining Area and will take the exact same path as Freddy with the exact same strategy. Instead of laughing, though, you will hear his metal footsteps. | |
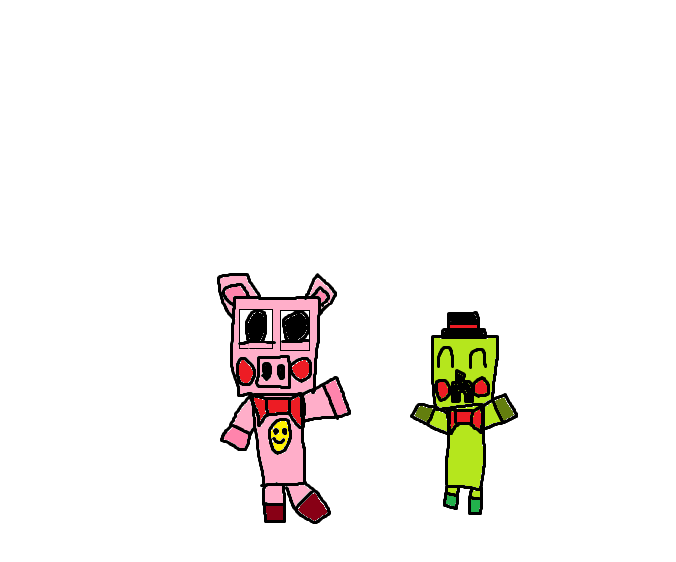
| Sharp the Wolf | Sharp is much like his past mate, Foxy. He hides in the Ship Cove and will slowly get out of the cove. Once out, he'll run through the Right Hall to your office. Try to listen for his quick footsteps, then use the right door to stop him. | |
| Trickster Pig | Trickster is the slowest of the pirate trio. She starts in the Ship Cove, where she'll get out of the curtains and slowly limp her way to the Left Hall. The door should be used to stop her, or else she'll jumpscare you. |
FazbearFreak's Finest[]
| Image | Character | Description | Notes |
|---|---|---|---|
| Grand Dad | There will be a TV in your office, showing off the classic Super Mario Bros. game. However, NES games don't last forever. If you see the TV beginning to distort, reset the NES quickly. Otherwise, the game will become 7 Grand Dad, and it'll only be a matter of time before Grand Dad himself ends your run. | If Grand Dad isn't active, the NES won't be there, but if the MOTHER cartridge is bought, the TV will show off gameplay of MOTHER 1 instead. | |
| Steve | If you hear a pickaxe hitting your closed doors, that means Steve is outside, mining your doors for iron. As he mines, power will be drained. Just open the door to scare him off temporarily. | ||
| Red, Chuck, and Bomb | Determined to make up for their own mediocre series of fangames, these angry birds will try to enter your office in this order: Chuck, Red, Bomb. If you see Chuck in the doorway, that means Red and Bomb will come soon after, so be prepared to close the doors as they attack. Note that they might try to attack from both doors. | ||
| Scratch Cat | Really? Okay. Scratch Cat will casually sit on your desk. If one of the cameras doesn't work, you can click Scratch Cat one time to have him help you out, instead of waiting for the camera to fix itself. However, Scratch Cat feels the need to constantly meow while working his magic, creating audio distractions...Why is he here again? | ||
| Knuckles | Knock knock! Knuckles, being rougher than the rest of them, will enter your office and try to break a circuit box on the wall. You need to click Knuckles to stop him from breaking the box. Otherwise, the power will drain quicker for the remainder of the night. Oh no! | ||
| Granddy Dadbear | There will be a Freddy figurine on the desk. If you spot it changing colors, click on it to revert it back to normal. Otherwise, it'll turn into Granddy Dadbear and end your run with a (ridiculous) jumpscare. | If Granddy Dadbear isn't active, the Freddy figurine will not appear. | |
| Sans and Papyrus | Occasionally, you may see Papyrus hanging out in either of the vents. If a controlled shock is administered on the same vent as Papyrus, Sans will become active. There's no way to stop Sans from entering your office, nor is there a way to tell when he's going to come in. All you can be sure of is that once he enters the office, you're gonna have a bad time. | If Sans is activated, a music box version of Megalovania will play until the night is complete or the player is killed. | |
| Gary | Making his FNaF Fanon debut, Gary will keep to himself in Spare Closet 2. If you hear him crying, visit that camera and offer him food, water, or maybe just a virtual hug, depending on what he's upset about. Nothing necessarily bad will happen if you ignore him, but properly comforting him may result in him appearing in your office to offer some help. | Gary's rewards are as follows:
| |
| O Face | The OG of the FazbearFreak universe. If you hear chugging, quickly put on the Freddy mask until it fades away. If you fail to do this, O Face will enter your office and kill you. | ||
| Freaky Fan | Even the Fan is against you. If you hear its blades spinning faster than usual, just click on it to make it calm down. Otherwise, you'll find out what Phone Dude meant by "watch the fingers". | The Freaky Fan's appearance will change depending on if the Golden Fan is active or not. |
One Night at Flumpty's[]
| Image | Character | Description | Notes |
|---|---|---|---|
| Flumpty Bumpty | Flumpty starts at Parts/Services; sometimes while viewing Parts/Services on the monitor, he will take his face off before looking at the camera, making the whole camera system stop working if looked at for too long or ignored. Then, it will only be a matter of time before Flumpty himself jumpscares you. Flumpty Bumpty can be evaded by using a Controlled Shock when he has his face off. | The Controlled Shock will only be at Parts/Services if Flumpty Bumpty is active. | |
| Birthday Boy Blam | Birthday Boy Blam is always waiting outside the left door. To get rid of him, double click the "Let's Party" Banner; this will make Birthday Boy Blam go to another room. If not moved, BBB will enter the office and jumpscare you. | ||
| Grunkfuss the Clown | Grunkfuss appears in a hole on the wall. He has three phases of slowly exiting the hole; during the night he will slowly progress to the next phase. if he reaches the third one, quickly double-click his nose. This will make him go back to his first phase. | ||
| The Beaver | The Beaver starts in the restrooms; when he's out of toilet paper, he may run through the left hall or the right hall. When that happens, quickly close the door (depending on the hallway, close a different door). | ||
| Golden Flumpty | Golden Flumpty randomly appears in the office. Put up the monitor and he will just flee, otherwise, he will crash your game. | ||
| Eyesaur | Eyesaur's eyes can be seen at the container in the Alleyway. His eyes will increase in number throughout the night; when the number reaches 78, Eyesaur will disable all of the mechanics in the game, making you defenceless. | Eyesaur's eyes can not be seen if Eyesaur isn't active. | |
| The Owl | The Owl starts at the women's bathroom, then, randomly, he will fly to your office by using the right or left vents. Close them to make him return to the women's bathroom, or he will kill you. |
Disaster19 Dummies[]
|
Image |
Character | Description | Notes |
|---|---|---|---|
| Neville | Neville will make his way to the office through the right hallway. He can walk through walls, so your doors don't work with him. The only way to make him go back is to put on the mask, as this will fool him. | ||
| Pork-ing | Pork-ing starts at Nightmare Storage; he will make his way to the office via either the left door or the two vents. To make him go, give him a good controlled shock. | ||
| Showtime Baby | Showtime Baby starts at the Left Party Room. She'll make her way towards the office by entering the right vent. When she's about to enter the office, you'll hear a quick giggle; close the vent or Showtime Baby will kill you. |
Non-Zomboss's Zany & Wacky Funhouse[]
| Image | Character | Description | Notes |
|---|---|---|---|
| Fluffy Fundog | Fluffy starts at the Dining Area and will make his way to the office through the left hallway. Closing the door will keep him out, but he will not leave unless you click his belly three times. If you do not click his belly the required number of times within a small time period, he'll kill you. | ||
| The Blackat | The Blackat starts in the Alleyway but doesn't appear on cameras. She'll make the lights flicker when she is close to the office; if you don't send a controlled shock her way, the lights will go out and she will kill you. | ||
| Blank Leo | A loud screeching sound signals Blank Leo’s activity. If you see him on a camera, you must boop his nose and put the monitor down so he won’t kill you. | ||
| Petrov the Panther | If you hear the sound of claws scraping together, it means Petrov is ready to get into your office through the vents. Type WAKANDA on your keyboard, and he’ll go away. Get it? Because... Wakanda... Panther... | ||
| BipBop | If you see a BipBop's face blocking a camera, you have to switch to another camera quickly, or else multiples of them will teleport into your office, and give you a little surprise when you put the monitor down. | ||
| Deathtrap (Non-Zomboss) | DeathTrap (Non-Zomboss) doesn't appear on camera, but you can track his location by checking a trail of blood that he leaves behind. He'll go through the vent, and you have to administer a controlled shock to send him away. | ||
| T.H.A.T. | If you see T.H.A.T. in the doorway, close the door immediately, or else he will enter your office, drain your oxygen, and kill you shortly afterwards. | ||
| Sammy the Snake | Sammy starts in the Supply Closet, and will quickly rush through the vent. Simply send a controlled shock to ward him off. | ||
| Hoppy Hare | Hoppy moves very quickly, and if you close a door on him, he’ll quickly run over to the other one. You‘ll need to shine him with your flashlight a couple of times if you want him to go away. | ||
| Dominic the Dog | Dominic will come to your office only when the door is closed and start pounding on it. This creates an audio disruption, and will not stop until you open the door. Chances are, you closed the door to keep someone out, so opening the door creates quite a predicament. You’ll just have to bear with the disruptions until you’re finally able to close the door. | ||
| Mustard & Ketchup | TBA | ||
| EXM 01 | If you hear loud, banging footsteps, it means EXM 01 is outside your doorway. Closing the door is ineffective; you have to press a button on your monitor to manually disable him. If you close the door on him, he’ll break it down, and it’ll stay broken and unusable for the rest of the night! | If EXM 01 is not active, the
button on the monitor will not be there. | |
| The Insane Puppet | If your oxygen is low enough, a present box will appear in your office. The box will open a bit every time you put your monitor up. If you pull it up too much, the Insane Puppet will kill you. |
The Wobblebobble Show w/ His Majesty Caelywobbles[]
| Image | Character | Description | Notes |
|---|---|---|---|
| Tom and Dom | Tom and Dom will move around separately, but always end up in your office at the same time, one at each door. To avoid them, simply seal both doors. Otherwise, they will enter your office, reunite and start having a casual conversation with each other, creating audio distractions. | The two are both voiced by PJ Heywood and are portrayed as very posh British entrepreneurs. | |
| Daniel | Daniel's training for the Olympics, and can be seen running throughout the whole building on the cameras. If he passes through your office however, quickly duck out of view by opening your camera tablet, or he will nick it as he passes by. | ||
| Dylan | Dylan will spawn in the ventilation system, unable to find his way out. If you let him stay in there, he will begin to create audio distractions (e.g. banging in the vents, complaining). To stop him from doing this, you must use a controlled shock in either the left or right vent to lure him there so he can escape. However, you must then quickly equip the Freddy mask until he escapes the vents and passes through your office to prevent him from seeing you and being scared back into the vents again. | He is voiced by Kellen Goff and portrayed as a grumpy senior who complains about almost everything. | |
| Dr. Smileyface | Dr. Smileyface will start in the corner of your office. Once per night, you can request for him to either max out your oxygen, max out your power, or send away all nearby animatronics. However, this comes with a price; he will jumpscare you, leaving you paralyzed temporarily. | He is voiced by Chris McCullough and portrayed as a very kind, caring person with a heart of gold...until he's finished his job for you. That's when his voice switches to that of an insane serial killer, his eyes turning bloodshot as he says "Now you must pay your price", before jumpscaring you. | |
| The Masked One | The Masked One will block the view of EVERYTHING, trying desperately to get you to see his beautiful face. If he's blocking the view of cameras, just ignore that camera and he'll eventually give up and leave. If he gets into your office (no way to stop him from entering) and blocks YOUR view, stay completely still. If you move, he'll think you don't care about his appearance and will kill you. | ||
| Trainwreck | Trainwreck has finally lost it and transformed into a savage beast. He will roam through the building; you must watch him on the cameras to see when he charges to your office. Once he does, you must quickly seal the door depending on which side of the building you saw him charging from. However, on his way, he will tackle down animatronics in his path, stunning them temporarily. | You can hear him growling and making strange animal-like noises occasionally. | |
| SOUL | SOUL will spawn at a random location in your office every time, starting off as an empty Tom head. Slowly, his white pupils will begin to fade into view. You must simply find him and hold-click on him to make his pupils fade out again. If he reaches his final form successfully, he will teleport onto your desk and create VERY LOUD audio distractions, usually mashups of random memes. | Just before he spawns on your desk, a warning will appear on the player's screen to tell them to take off their headphones if they are wearing any. | |
| HIM | Keep your eyes peeled on every camera. If you see his white pupils lurking in the shadows, quickly switch cameras or pull down your camera tablet to prevent him from jumping out of your monitor and jumpscaring you, restarting the night. |
Slogan2's Characters[]
| Image | Name | Description | Notes |
|---|---|---|---|
|
Rick | Rick was an experiment created by Afton, and Afton's first-ever creation. He will randomly dangle down from the ceiling, and you will have to double-click on him to make him fall down, or else he will make a LARGE audio distraction by either bragging or telling a fake story about himself and his imaginary girlfriend "Michelle." | You will hear a faint "Here I go!" and then a whooshing sound whenever Rick is about to dangle down. That is your only warning. He will also blend into the office by pretending to be a decoration, so you have to pay careful attention if you want to spot him. |

|
Gary the Gadget Guy | Gary will randomly appear on your monitor without warning and try to send you an E-Mail. Quickly close out of the E-Mail tab before he sends it, because when he does, it makes an extremely loud "YOU GOT MAIL" sound, and locks you out of your monitor for some time. | When you try to open the monitor when it's locked, Gary will say "Hey! Don't be rude!" and drain 1% power. |
|
Destructo | Destructo is a scrapped experiment made by Afton. He will appear in Backstage inside of a box in the corner of the room that says "Spare Parts." He will try to crawl out, and the only way to prevent him from escaping is by lowering the temperature. If Destructo gets out of his box, you're dead, as nothing can stop him. | When he kills you, instead of saying something, an orange pair of eyes will appear over the "Game Over" text. |
|
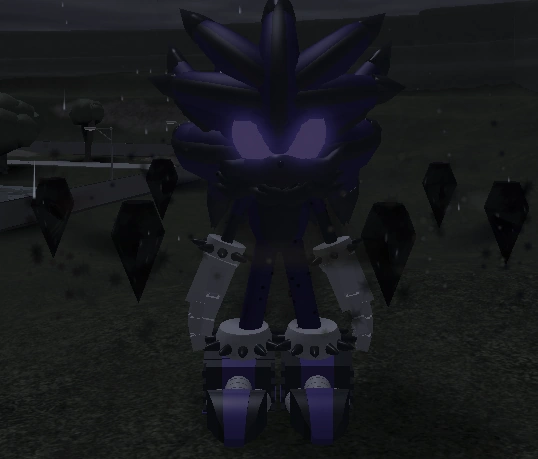
Dark Gauntlet (Slogan2 OC) | Dark Gauntlet will slowly materialize in your office; the only way to get rid of him is to crank up the heat. Shining your flashlight will make him materialize faster. If he fully materializes, he will kill you, or very rarely halve your power instead (Ex. your power is at 100%, he jump-scares, and now it's at 50%). | If you want to learn more about Gauntlet as a Sonic OC, click here. |

|
The Virtual Boy | Yep. The console got tired of being hated on, so it came to life, and is now tracking down its biggest hater...who happens to be William Afton. The Virtual Boy will randomly appear under the desk, and you have about 3 seconds to click on it before every color turns red and black for 30 seconds, as well as the visuals becoming blurry every few seconds because of the guard getting a terrible headache. It also has a 10 percent chance of killing you instead, which increases in chance the lower your oxygen gets. | The Virtual Boy's "Game Over" quote is in Morse code, which, when translated, says: "What were you thinking? Did you think I held some piece of important lore? Well, I did not, so I guess you wasted your time. Bravo. Clap. Clap." |

|
Giegue | Giegue will slowly start to fall from the ceiling. In order to keep him at bay, you must change the song on the Music Box to "The Eight Melodies" and wind it up fully. If he gets all the way down, he will turn into Giygas, blinding you for the rest of the night. | Giegue will occasionally jump-scare the player in his Giygas form. This is just a distraction, as it won't kill you. He will also whisper stuff like "help.. me..." or "Ness..." in his Giygas form. |
|
Foxy (TheHottestDog) | Foxy will sit in the Supply Room on his laptop, watching inappropriate videos that drains the power and making loud audio distractions by munching on his bag of BARBECUE FLAVER CHEPS. To stop him, turn off the power in the Supply Room, but don't keep it off for too long, or he will become angry and kill you. | If Jenny is enabled and wakes up, she will attack Foxy (THD), deactivating him for the rest of the night. If Foxy (THD) comes across any other Foxy, he will stop to think for a moment. |

|
XJ-9/Jenny | Jenny will be deactivated in the Supply Room with Foxy (THD), but will slowly charge up. You have to blow out her power box to prevent her from charging up fully, but it will fix itself after a few seconds. If she is fully charged, she will wake up and attack Foxy (THD), creating a VERY LOUD audio distraction. The plus to this, however, is that Foxy (THD) is now dead, and will be disabled for the rest of the night. | If Foxy (THD) is disabled, Jenny will also be disabled for the rest of the night. |

|
Star Dream | Star Dream will appear in the Alleyway, found in the trash. If it wakes up, it will make its way to the Backstage and try to electrocute the Power Box, cutting your power in half. To prevent it from doing this, give it a controlled shock. When shocked, it will go back two rooms and be deactivated for a minute. | When it moves, you will hear a faint giggle. If Rick is in the room telling a story, Star-Dream will stop to eavesdrop and listen to the story. |
|
SIN | Sin will randomly appear in your office and rapidly drain your power. Quickly pull up your monitor. If you do so, you gain 10% power. (Ex. If you lost 50% power and stop SIN, your power would then be at 60%.) | SIN will say garbled speech while in the office. When decoded, it sounds like a man's pleas for help. |

|
Arcade Bunny | The Arcade Bunny will pop out from under your desk, and ask you if you want to buy something with Faz-Coins. All of the stuff is useful, but if you say no or can't afford anything, he will screech in anger, causing an audio distraction, and then disappear for the rest of the night. | If you do buy something from him, he will say "Thanks!" then leave. He will return the next hour. |

|
Sniper Joe | Sniper Joe will sometimes appear in the Alleyway and sell useful stuff. If you don't buy anything by 3 AM, he will slowly go to your office. Get rid of him by closing the door he appears at. If Sniper Joe makes it, he will either jumpscare you or obscure your view. | If you get jumpscared by him, the Game Over text becomes green. |
|
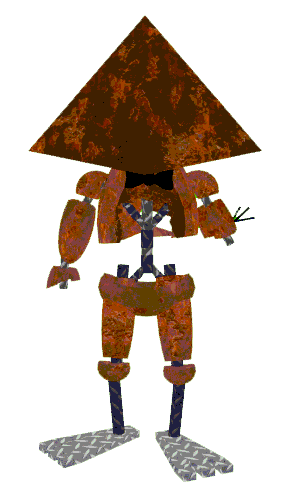
Pyramid | Pyramid will try to enter your office using the vents. To make him go away, use a controlled shock. However, that wastes power, so the Flashlight can also delay him. If Pyramid gets out of the vent, he will kill you. You will know when he is in the vents when you can hear thudding sounds and a low, deep voice. | When Pyramid is out of the vent, weird black gunk can be seen coming out of the vent. His Game Over screen has bloody slash marks. |

|
Vriska | Vriska will randomly appear in the Pirates Cove and fly towards your office. Much like Foxy, block her with the door she's going for. If she gets in, you will be paralyzed for the rest of the night, with your mouse speed becoming very slow. | When Vriska is active, a kids drawing of her will appear in the office. |
| Souldozer | Souldozer will appear in the alleyway and try to make it to your office via the backdoor, due to his massive size. He is like FNaF 1 Foxy; you gotta keep an eye on him, or he will run into the office, and you will most likely die unless 6AM comes fast enough. | When he runs into the office, you can hear a grinding noise. |
Lord Bowser's Squad[]
| Image | Name | Description | Notes |
|---|---|---|---|
| Tyrannosaurus Rex/Rex The Tyrannosaurus | The tyrant lizard returns... You'll randomly hear Rex's roar from a distance, signaling his arrival. While coming for you, he will make various roars and growls, which will get louder and louder. Quickly close either the left or right door, or use an audio decoy on another camera to lure him away and even make him fight with Spino, if their paths cross. | Rex and Spino's fight keeps them away from your office, as for a short period of time they will ignore you. | |
| Spino The Spinosaurus | Spino is quite aggressive. He quickly goes from room to room towards your office. Audio decoys will not always work on him. When he's at the doorway (left or right), quickly close the door. You can lure him (if he gets fooled by the decoy) to the same room in which there's Rex at the moment, making them fight. | Rex and Spino's fight keeps them away from your office, as for a short period of time they will ignore you. | |
| Bartia The Baryonyx | Bartia is like a crocodile; silent, and specializing in fast and painful clamping of jaws on her victims. She will come from the vent behind you. In front of the vent will stand three heater-like racks; when she arrives, press L to activate the heaters. The extreme heat will make her go away. | Her mechanic is a reference to the scene in Jurassic World:Fallen Kingdom. | |
| Ray The Velociraptor | The most aggressive of the original four, Ray is a very dangerous animatronic. He often runs throughout the rooms to get to you. Quickly close the doors on the side from which he comes. He is very intelligent, so audio lures will not work on him at all. He may occasionally cross the paths with a random character, stopping both him and them for a short period of time. | He acts aggressively towards any character in ONoE:UCN, stopping them for a short period of time. | |
| Twisted Indoraptor | They don't call him 'Ripper' or 'Butcher' for no reason... Now you have the most dangerous creature that has ever walked the earth added to your night. This animatronic is not only very intelligent, but also very fast and very aggressive. He'll run to either the left or right door. Close it as soon as possible to survive. Twisted Indoraptor doesn't go away so quickly, however. He can wait behind the doors for a short period of time, or maybe even the entire night, which results in a great loss of your power. | ||
| Axel Foley | Hey! The legendary Beverly Hills Cop is back! Axel will come from the right side of your office. When he appears in the doorway, you need to quickly search cameras for a communicator-like thing. Click it as soon as possible, and a dot on it will start glowing red. This will cause Axel to go to the camera where the comunicator device is found. Failing to do so will result in him shooting you, ending your night. | His jumpscare is him screaming for a second, and then shooting you with his pistol. After the jumpscare, his laugh can be heard. |
POPGOES[]
| Image | Name | Description | Notes |
| Popgoes the Weasel & Blackrabbit | Popgoes starts the night on Spare Stage 1. After leaving the Stage, he will walk between the 3D Printer in the Parts/Services and the office. In Parts/Services, he will print a part of the Blackrabbit (Right Leg, Left Leg, Torso, Right Arm, Left Arm, or Head, in that order) and carry it to your office. Give him a Controlled Shock once he's in the Right Hall, and the piece will fall apart, causing Popgoes to go print a replacement. If all six pieces end up in your office, the Blackrabbit will end your run with a jumpscare. | ||
| Stone the Crow | Stone will randomly appear in any of your camera feeds, holding a sign with an intimidating message. This disables everything that can be accessed from that camera until you click over to a different camera. | ||
| Sara the Squirrel | Sara starts on Spare Stage 1. She will go to the Right Vent and attempt to get into the office. Once she reaches the vent blindspot, shine the light on her until she goes away, or she will drain 15% Power. After being repelled or draining the power, she will return to Spare Stage 1. | ||
| Saffron the Squirrel | Saffron starts on Spare Stage 1. She will go to the Left Vent and attempt to get into the office. Once she reaches the vent blindspot, shine the light on her until she goes away, or she will drain 15% Power. After being repelled or draining the power, she will return to Spare Stage 1. | ||
| Blake the Badger | Blake sits around in the Parts/Services, trying to remotely interrupt your camera feed. When he succeeds, the monitor will flash a sequence of solid colors before going black. The player must then reboot their monitor by pressing the colored buttons on their desk in the same order that they flashed on the monitor. If Blake disables the monitor while the player isn't looking at the cameras, the sequence will flash as soon as the player pulls up the monitor again. | Blake will never succeed at interupting the camera feed while Simon is attacking. | |
| SEC-Strings | SEC-Strings is inside of the player's office at all times, awaiting the player's commands. The player can tell SEC-Strings to monitor a room once every hour, causing all Animatronics currently in that room to act like the player is watching them. After a certain amount of time, SEC-Strings will turn off its monitor, then need to recharge for the rest of the hour. The amount of time before deactivating is dictated by its AI Level (Higher AI = Less Time). | ||
| Simon | Simon is chained to the wall in the player's office, inactive. When he activates, his eyes will glow a color and his head will slowly rise to look at the player. To deactivate him, the player must press the corresponding colored button on their desk. If the player does not do this quickly, Simon will break free and attack, and believe me, it won't be pretty. | Simon will never become active while Blake has broken the monitor. |
Shadow's Crew[]
| Image | Name | Description | Notes |
| Paul the Penguin | The dancing penguin is back for the show! He'll start in Spare Stage 2, making his way through Spare Room 2 and Left Hall, but the catch is that he's hiding, and the only way to know he's in a room is to listen for faint tap dancing. Fail to notice it, and he'll dance his way into your office. | ||
| Peter Polar | This amateur pianist will be inside your office playing his piano, causing an audio disturbance. You can make him stop by clicking on him, but he will start playing again after a while. Watch out if he plays a more tense tune, as he'll be in a bad mood; clicking on him before waiting a few seconds will make him enraged, jumpscaring you. | ||
| Thomas Tiger | Rejected and forgotten, this grumpy old tiger will be deactivated in the Backstage, occasionally going for a walk around the Left or Right Hall. Catching him on either camera will anger the tiger to the point of making that hall's respective door unusable for a short period of time. If you catch him in the same hall while the door is still in its unusable state, he will not shy away from taking a bite out of you and ending your run. | Tom looks a little different than usual, having his costume all tattered and missing half of his face, exposing his endo head. | |
| Aster the Armadillo | After his old job at the park's arcade flopped, he decided to become an indie game dev. He will stay at the Game Area loading a game on his laptop, which you can stop by clicking "shut off laptop" while on the Game Area's camera, making him have to restart the whole thing. If the game fully loads, one of four minigames will appear on the screen, and will stay there untill you finish them. | The four minigames in question being:Plook's Quest, Funroad, Dragon and Old West. | |
| The Trickster | Having the chance, The Trickster will host one of his famous trick shows at either the Left Party Room, Right Party Room or the Dining Area. Not able to attend it in time? No worries! He'll perform a magic trick inside your office, making sure you'll not pay attention to anything else untill he's done, and you'll like it! | ||
| Silver the Spider | This piece of scrap will stay in Parts/Services as long as you keep a watch on it. Fail to do so, however, and all your cameras will be deactivated for about 10 seconds. | Silver's missing all of his costume, practically being only an endoskeleton. | |
| LHBgZdL | Occasionally, glitchy and distorted models of Freddy, Bonnie, Chica and Foxy will appear while you use the cameras. | 'Vgdqd zl H?' |
FRAVIUM /w The "FNaF 8 Wannabes"[]
| Image | Name | Description | Notes |
| Captain Funtime | Captain Funtime will sit the whole night in his closet, waiting for you to stop watching him. If you don't watch him enough, he will come into your office and happily jumpscare you. | ||
| Crewmate Bernie | The best lion in the pirate world is coming for you, waiting until 2 AM to strike. Remember to close the left door! | ||
| Sailor Nemo | This fella is more relaxed, waiting until 4 AM to strike. Close the right door to prevent his jumpscare. | ||
| The FazPuppet | Inside Parts/Services, there is a hidden music box. Find it, wind it, and keep it going. Otherwise, the FazPuppet will break into your vents and join the Ventcrawlers for the whole night. | ||
| Pirate Chica | Holding her cupcake in her birdie bird claws, this parrot will fly into your room. Don't click it! It makes the noises of Rockstar Foxy's parrot, but it contains a very unpleasant surprise. | ||
| Shriveled Spring Bonnie | Shriveled Spring Bonnie is a VERY VERY angry boy. Let him rest, or he will definitely try to come for you. He is in the office, and a flashlight flash will wake him up, so don't flash it nearby. | ||
| Relic Fredbear | Sitting lifelessly in the closet, Relic Fredbear will cause you to have hallucinations and make weird noises. To ward him off, activate the Global Music Box. | ||
| Deathtrap (FRAVIUM) | When Deathtrap appears in your office, you have a split second to flash him with your Flashlight, or else he will jumpscare you. |
TJOC (The Joy of Creation)[]
| Image | Name | Description | Notes |
| Ignited Freddy | When Ignited Freddy appears in either of the Party Rooms, flash him and close both hall doors quickly. If you're not quick enough to flash the light when he appears, or too slow at closing the doors, well, it's time to die. | ||
| Ignited Bonnie | If Ignited Bonnie appears on one of the cameras and you don't switch cameras or turn it off quick enough, he will disable the camera for a whole hour. | ||
| Ignited Chica | Ignited Chica will randomly appears in the office. Once she appears, you need to find and flash 3 Cupcakes hidden in the camera system. If you take too long, she will end your run. | ||
| Ignited Foxy | Ignited Foxy will appear in either the Left or Right Hall. If you watch him for long enough, he will disappear with a scream. Take too long? He will make you scream. | ||
| Ignited Golden Freddy | A little helpful, this guy. If Ignited Golden Freddy appears on a camera, click him for 5% extra power. However, this comes with a risk;he may take 5% of your power instead. As Ignited Golden Freddy is flashed, a fire begins to burn and get closer to the office; flashing him a twelfth time will kill you. | ||
| Endo B
"Angel" |
Endo B starts in the Alleyway and quickly makes his way towards you. Watching him will keep him in place for as long as you watch him. Once he is at the right door, close it, or he will kill you the moment you raise the cameras. He will not appear by light, and can only be seen on camera. | ||
| Endo C "Mouth" | Endo C starts in the Alleyway and quickly makes her way towards you. Watching her will keep her in place for as long as you watch her. Once she is at the left door, close it, or she will kill you the moment you raise the cameras. She will not appear by light, and can only be seen on camera. | ||
| Endo R "Blue" | When you begin to hear some heavy footsteps from the right, it might be a good time to close the door. Unless, of course, you want to die. | ||
| Endo F "Red" | A red light getting closer from the left door? Close it, I suggest. Unless you want an end to what could've been a good run. | ||
| Creation | Creation begins in Parts/Services, staring at the camera. Flash him to make him sit back down. If not flashed, Creation will move to the next room:the Game Area, and begin his inactive state before staring at the Camera again. He will then progress to the Left or Right Party Room, then the hall, before he finally goes in for the kill! | ||
| Ignited Springtrap | Ignited Springtrap begins in the Saferoom, and proceeds to make his way to one of the Party Rooms, then to the vents. Watch for him, and once he is behind you, put the mask on. Turned out becoming Ignited failed his sensors, huh? |
Five Nights at Super Mario's Characters[]
| Image | Name | Description | Notes |
| Mario | Mario will appear in your office and start to take cameras offline. Flash your light at him to make him go away. | You can also put your monitor up and down to scare Mario off too. | |
| Luigi | Luigi will run through your office a total of 3 times; once he's run through a third time, he will kill you. When you see him in the hall, close the door before this happens. | You have a 10-second span of closing the door before Luigi completes a "lap"." | |
| Yoshi | Yoshi will come through your vent and appear in your office. Put your mask on to make him go away, or he will end your run. | You can prevent Yoshi from coming into the office by closing the vent. |
Zonic's and Salem's Content[]
| Image | Name | Description | Notes |
|---|---|---|---|
| Bartech | A brown rabbit with a green jacket and blue pants with a circle for a head. He looks like something from the ONwaB games. Make sure to monitor the cameras often and focus on the brighter areas. If you see Bartech OUTSIDE the Supply Room (where his laptop is), don't panic. If he's inside the vent, that's when you wait. If he's inside the office, go to the Supply Room camera and click on the box with the note "Very good stuff no touch" on the top shelf;this'll make him go back. If you fail to do this, he'll either take your tablet or kill you so he can take it later. | This is HEAVILY inspired by the FNwMT games. | |
| Zonic | A FNaS-looking hedgehog that's red and wears a blue hat, blue bowtie, and shoes. He also has black eyes without pupils. Zonic chills in the left hall, occasionally showing 3 signs:
If you neglect Zonic's signs, he will get into the office and start draining the power. Flashing the light on him will stun him for a second, though you can only do this 5 times before he drains the power even more. |
||
| Gorefield | A large, demonic mutated cat that can change it's appearance. It could be either a worm with a head, or a really tall cat. Sometimes, it looks like the "I can smell you Jon" Gorefield meme. If you hear "I'm sorry Jon", look at one of the hallway cameras. Make sure you don't make too much noise while doing this (i.e. switching the cams too fast and/or frequently, shutting/opening doors too fast). Depending on where Gorefield is, shut the other door and DON'T MOVE. He'll leave after blocking the entrance he came through. If this is failed or you make too much noise, say goodbye |
||
| Albert | Albert is a Roblox character dressed like a Despicable Me minion with an Rthro head, black fedora, and a black bowtie.
He will start at Spare Stage 2, where he will then go outside and into one of the hallways. If the door is shut, he'll wait until you open it, then go to your room. When he's inside, you must click on a red button to scare him off. |
||
| Jayingee | Jayingee is a Roblox character dressed like a zombie with an Rthro head. He will start next to Albert on Spare Stage 2, where he will then enter either the left or right hallways, indicated by the sound of him yawning. You must locate him on camera, wait until he moves if he isn't standing super close, then click on his nose to send him back to Spare Stage 2. If you fail this, he'll wait in the corner and randomly attack the door he's at, draining 10% power every time. | ||
| Samuel | Samuel is a Roblox "bacon-hair" character with sunglasses and black gloves. He behaves similar to Albert, however, now he goes through the vents. If you hear banging, look at that camera to check if he's there. If he isn't, he's already inside, and you must press the red button. If he is there, put down the monitor and then press the green button in the office. | ||
| Su-Tart | Su-Tart is a Roblox "bacon-hair" character with no notable changes to the regular Roblox one, save for the color of it's eyes changing constantly. Su-Tart starts in the Safeoom. If you hear laughter getting louder and louder, wait until it reaches it's peak, then choose the color of the eyes in the right corridor. Failure to do this in time or to choose the right color will result in a random tool being disabled. | ||
| Guest | Guest is a purple Roblox guest. That's it. He will start in Spare Storage 1, separate from the other FNaA 1 boys. Make sure he gets to them, otherwise his abscence will make them even faster, even if they are on 20 (though for a shorter time). Otherwise, he will attempt to run through the office, where both doors must be opened when he runs through, lest he end your night. On 20, he'll be even faster when he enters the office, but appears less. | ||
| Golden Su-Tart | GST is a golden version of Su-Tart with a black bowtie and top hat. Make sure that, when you're looking at the supply room, he isn't facing you. One way to prevent this is to constantly click on him when looking there,; however, that isn't the most affordable way to do it; just keep the office silent, and he won't move much at all. If he does stand up while you look at the room, switch away or turn off the camera for a few seconds to prevent his attack. | ||
| Shadow Su-Tart | Shadow Su-Tart is a dark-purple version of Golden Su-Tart with a small rip on his torso. He resides in Spare Storage 2, watching vids on his Linux computer. Make sure it's properly powered and has good internet connection, otherwise it's death for you. To make sure it's powered, press the "Give Power" button to get rid of 5% of your power in order to raise his to full, but his attack will still happen if his Wi-Fi sucks. To make sure SST's Wi-Fi is good, pay 4 Faz-Coins to pay the internet bills before it goes fully down. If you fail SST, he'll drain your power, then 10 seconds later, he'll kill you. | ||
| Rust_010 | Rust is a Roblox character that has rust on his red torso, a white body, and light-blue legs. He starts somewhere next to Bartech in the Supply Room. If he appears in the right hallway, wait until he enters, them click the lamp on your desk to scare him off. If you fail to do this, you're dead. | ||
| Classic Zonic | This fella has a timer that runs down if you aren't watching any camera, so make sure to keep a constant eye on them, otherwise you're dead. | ||
| (for sale) | (for sale) | (for sale) | |
| (for sale) | (for sale) | (for sale) | |
| (for sale) | (for sale) | (for sale) | |
| (for sale) | (for sale) | (for sale) |
One Night with a Box[]
| Image | Name | Description | Notes |
|---|---|---|---|
| Box | Yes, he is here. Box will go through the pizzeria until he ends up in the office. If you spot him in your room, click him to punch him out. He'll also make William panic, causing the screen will shake. | ||
| White Box | White box starts next to Box, but goes through the opposite side. If you spot him inside, click him to send him out. He won't make you panic, unlike Box. | ||
| Golden Box | If you spot Golden Box in any of the cameras, he is inside your room. Pull the monitor down and punch him quickly, or he will attack you. Golden Box will also make William panic. | If you use the Death Coin on Golden Box, Spring Box will attack. | |
| Rainbow Box | Rainbow Box will move to your room like Box and White Box, but at a slower pace. When he gets inside, William won't panic, but the lights will flicker instead. Punch him before it's too late! | ||
| Spring Box | The one you should not have boxed. Spring Box only appears if a Death Coin is used on Golden Box, and will kill you instantly upon the coin's use. | ||
| Shadow Spring Box | Shadow Spring Box will occasionally appear in your office, draining the door power. Punch him to stop that. | ||
| Shadow Rainbow Box | Shadow Rainbow Box will appear inside the vent. Shock him, or just wait until he gets inside and punch him unless you want a Game Over. | ||
| Marcell D'avis | If you hear Marcell's song, look through the cameras; if you can find him in time, press the "FIX" button to repel him and fix the DSL Modem. | If you deathcoin him, Shadow Marcell will attack. | |
| Shadow Marcell | Shadow Box only appears if a Death Coin is used on Marcell D'avis, and will kill you instantly upon the coin's use. | ||
| Broken Box | Broken Box might come into the office; once you spot him there, punch him. He won't make you panic, and the lights won't flicker. He will also be at the right side of the room everytime he gets in. | ||
| Broken White Box | Broken White Box might come into the office; once you see him, punch him. He will be at the left side of your room. | ||
| Crowbar | If you see Crowbar on the cameras, press the "CANCEL" button, but NOT the "IDC :)" one. The order of the buttons, and what camera Crowbar appears on, is random. | Crowbar came from a game that inspired ONWaB. | |
| Phantom Box | Phantom Box is in one of the spare rooms, spinning around constantly. If you see him not spinning at any point, click the "play" button to get him rotating again, lest he attack you. | ||
| Phantom White Box | Phantom White Box will sometime appear in the left hall cam. If you see him, he'll jumpscare you, and you won't be able to punch any Boxes that show up for a while. | ||
| Phantom Golden Box | If you see Phantom Golden Box in the cameras, pull down the monitor and pull it up again. The chance of him appearing when you switch cams gets lower with the A.I., while the chance of him appearing in the cam you're currently viewing gets higher. | ||
| Green Box | If you see Green Box's red eyes and hear laughter, go to a random camera and press the AUDIO button. |
CJCreations's All Stars (Will add more)[]
| Image | Name | Description | Notes |
|---|---|---|---|
| Creepster | Creepster is a Creeper animatronic with a black bowtie and top hat. He will quickly go from Soare Stage 1 to Backstage and mess with the pizzeria's wiring. When a ! symbol appears on your screen, go to the Backstage cam, as he will be draining your power; give Creepster a controlled shock to make him stop. He will attack you if the power goes out due to his tampering. | Creepster is the main character of CJCreations' main FNAF fan game, Five Nights at Creepster's.
| |
| Metal Chris and Shadow Chris | Metal Chris and Shadow Chris are a metallic, derpy version of Chris, and A shadowy Chris with white eyes respectively. They work as a tag-team duo, and will go down the halls. Metal takes the right, Shadow takes the left. Metal is fast, Shadow is slow. Metal makes footsteps, Shadow is near-silent. When you hear fast footsteps (Metal Chris) or deep laughter (Shadow Chris), pull up the monitor for about 3-5 seconds to avoid death. | Metal Chris and Shadow Chris are personal favorites of CJCreations.
| |
| Phantom Chris.Sal | Phantom Chris.Sal is a ghostly version of CJCreations. He will randomly appear on any of the cameras. When you see him, he will appear in the office and cloud your vision more and more before killing you; you can stop this by turning on the A/C. | Phantom Chris.Sal believes that he made Five Nights At Creepster's, which is a lie.
| |
| Major Chrome | Major Chrome will come from the Alleyway and quickly teleport to the Supply Room, then to the Rich Bank, and finally to the Office. When he gets into the office, he will disable the heater unless you wear the Freddy mask quickly enough. | Golden Chrome is the "Golden Freddy" of Five Nights At Hansen's. | |
| The Rasconette | The Rasconette will appear at either office doors; if you don't shut the door quickly enough, he will get in and darken your vision before eventually killing you. Turning on the door light while he is at the door will result in him instantly killing you. | The principal of Hansen, and the antagonist of Five Nights at Hansen's.
| |
| The ErRoR | When The ErRoR activates, he will appear on the Classic Stage as a multicolored version of a non-active ONoE:UCN character, copying their mechanics. Each time you defend yourself from him successfully, he will turn into another character. | The ErRoR was a glitched version of all the FNAH 1 characters in their original game.
| |
| Bryce | Bryce will start at Ship's Cove and quickly move to other cams. When he gets to your door, he will either laugh or make rustling noises. If he laughs, use the door light. If he rustles, use the door. | Bryce is based on Captain Bryce Pancakes, one of CJCreations' friends. | |
| Ghost Simone | Ghost Simone will start to appear on cameras if you look at them for too long. Flip the monitor down to stop her, or be prepared for a jumpscare, along with some oxygen taken away and the monitor not working for a while. | Ghost Simone is based on another one of CJCreations' friends. | |
| Salvage Chris (FNAJ) | Salvage Chris (FNAJ) will start in the Alleyway, and silently go to your office. You can track him on the cameras, though he will take up the entire camera he is on, but beware, as if you look at him for too long, he will kill you instantly. When Salvage Chris (FNAJ) gets to your office, you must flash the door light on him to make him leave. | Salvage Chris (FNAJ) is inspired by 27 Golden Sonic from FNAS 3. | |
| Endothony | Endothony will randomly corrupt the cams with a 3-color message. Put the colors in order with your buttons to fix them, or expect a jumpscare! | Endothony is the endoskeleton of Anthony (another robot). | |
| W.I.P. | W.I.P. is light-sensitive, and will move if not checked on enough in Parts/Services. A meter can be filled by checking him on the monitor; if his meter depletes fully, he will dash to different cams every 5 seconds unless you check on him again. Once he gets to your office, well, its only a matter of time before either 6AM or your demise. | W.I.P. is an unfinished prototype of the robot Nate from Five Nights at Donahue's. W.I.P. stands for Work In Progress. | |
| Brain Freeze | Brain Freeze is very slow, but might be the most dangerous character in the game. He will slowly make his way from the Alleyway to your office. The second he reaches your office, he will kill you. Your only defense is playing an audio lure, which has a 20% success rate. He moves faster if you overheat or lose too much oxygen. | Brain Freeze was once a night guard who froze to death in a freezer, but was brought back to life. | |
| Suicide Creepster | Suicide Creepster is a white version of Creepster with a red hat and bowtie, along with other features. He will make his way from the Rich Bank to your office. When he gets to your doors, you will be able to see red-white-red-white flickering lights in a open door, along with a faint scanning noise. When you see/hear this, stay as still as you can manage so he thinks you are already dead. Noise, fast movement and overheat will agitate him into killing you. | Suicide Creepster was a robot (specifically one of the lost ones) built to entertain, with an option to stab the person who activated him with a knife to end it all. | |
| Toy AMALG | Toy Amalg will be in a random room performing. This can actually distract others passing by or who are in the room he's in. Sounds like a plus, right? Well...you need to keep his entertainment bar up by watching him yourself. If it drains completely, he will quickly go to another room and peform. (Note that if he gets into the prize corner, he will simply make the Music Box drain quicker for a bit before moving again) After 2 moves, he will enter your office and peform, causing loud audio disturbances. You must watch him in the office to keep a new, smaller bar filled. If you ignore him again, he will give you something to really look at! | Toy AMALG is the original version of the AMALG robot. | |
| Dark Creepster | Dark Creepster comes from the Classic Stage, and will make his way to your office. If he's in the halls (i.e. close to your left/right door), turn on the light before he gets to the door or he will get in regardless of if it's closed or not. If he gets in, he will fade in more and more each time you flip up the monitor. You have 25 monitor flips (flipping the camera up then down is one flip) before he fades in fully and kills you. | Dark Creepster was a suit used by an evil person to commit atrocities. The grief and pain the person caused overwhelmed the suit...awakening it. | |

|
Christopher Salerno | You will randomly hear Christopher say:
When you hear this, you need to quickly look in the cameras for him and click on him. He acts quickly after finishing his line (5-8 seconds), so look fast. If you are too slow, he will either disable the cameras for an hour, or disable the camera he was on for the rest of the night! |
Christoper Salerno is the Creator. |
|
Creepy and Oinky | Creepy and Oinky will randomly appear on your desk and ask if you want to play a game; if you say no, they will leave, but if you say yes, they will lock the monitor temporarily and quickly toss around a blue, red, green and yellow plastic ball. After they toss all the balls, they will stop, hide the balls in their hands and say "Now, who has the (blue/red/green/yellow) ball?" If you guess correctly, they will offer 3 perks to you:10%/20%/30% power back, one cam's enemies reset to their original state, and 100% oxygen. If you guess incorrectly, they will say "Sorry, incorrect!" and hop off the desk, giving no perks. | The more Creepy and Oinky's games are accepted, the less of a chance they will appear later.
|
| Puppet G and Puppet A | Puppet G will be asleep on one of the cams, covering the whole camera. He will become more awake the more you look at the camera he is on. If you look at the cam he is on enough to fully wake him up, flash the vent you hear rustling from or Puppet A will end your run! | Puppet G and Puppet A are based on Gabe and Arlo, two characters from another FNaF fangame series made by CJCreations.
| |
| Plushthony | Plushtony will be asleep in your office on the desk, and will slowly awake. If he becomes fully awake, he will stare at you before taking a hammer and slamming it down on your monitor at a random time, disabling the cams for the rest of the night. You must hold your cursor over Plushtony to make him fall back asleep. | ||
| Molten Domo | Molten Domo will randomly appear in the hall when you hear mechanical groaning:this is a warning that M.D. will be in your office the next time you flip down the cameras. Make sure no electrical or mechanical devices are used while he is in the room, or the power will rapidly go down while they are used. He can be driven off if you put on the mask for some time. | When the Plushie Pizzeria Disaster struck, DBGF and his RustEndo minions beat Molten Domo with crowbars and metal bars, messing him up. He was thrown into an alleyway and deactivated. However, when he was struck by lightning, it re-activated him, but also burned his wires. Molten Domo now roams the alleys, looking for parts and batteries. | |
| 2020 Golden Porkchop | 2020 Golden Porkchop will randomly appear in your office and rapidly decrease your oxygen. Be quick to give him a controlled shock, because he will kill you if your oxygen gets too low. If your oxygen is already too low when he appears, you will get 1-2 seconds to shock him. | When the original Golden Porkchop was locked in the safe room, he craved freedom. When the Plushie Pizzaria Disaster set the saferoom on fire, Golden Porkchop finally escaped, but his body was melted a bit. He was later further broken when he was thrown into a dumpster with a raccoon, who took some of his suit. He currently resides in a unknown location. | |
| R2/RTerror | R2 will climb above you in your overhead duct system and advance to you; first it will drain oxygen, then it will start to power, and finally, it will start attacking your overhead hatch. If the hatch is destroyed, he will be frightened and return to his original location, but there will be nothing left to stop R2. If he reaches the exit when the hatch is destroyed, he will transform into RTerror and jumpscare you! Use the controlled shock to send him back before he can do this. | Designed as a cleaning/maintenance robot plush, R2 was sent to Plushie Pizzaria, where he sadly remained deactivated for a long time. When the Plushie Pizzaria Disaster happened, he re-activated and started cleaning and repairing. While he was working, a virus infected him and added his RTerror personality. When he found out about the Ultimate Custom Night, he time-traveled back to participate in it with his new RTerror personality. | |
| ShyBombit | This tag-team trio, now one being, will sometimes appear in the vents. Quickly close the vent door, or it will get into the office. If its eyes are red, it will make the doors open and close at random. Use the heater to drive it away. If its eyes are purple, it will mess with the flashlight causing it to randomly flash and blind you for a bit. Flash it with the light for some time to make it leave. Finally, if its eyes are yellow, it will disable the cameras. Cool temperatures will cause it to leave. | When the 2018 Plushie Pizzaria Disaster happened, the Trickster Trio were damaged in the accident. Salvage CJ soon found their broken bodies and put them back together as one plushie. | |
| Salvage CJ | This damaged purple-and-green Freddy-looking character will run around the building, looking to help you. This "help" includes making the Music Box wind down faster, draining more power with power draining characters, and more. However, he can give you bonuses if he makes it to the office, though beware, as he can also speed some characters' movement up temporrarily. | Salvage CJ was once a kind of goofy character, but when the Plushie Pizzaria Disaster struck, CJ was badly damaged and ripped up. Even though he helped other plushies that were in trouble, he is still angry about his damages. | |
| Demonic Blacklight Golden Freddy | A demonic version of a robotic demon. Demonic Blacklight Golden Freddy will appear on the cameras from time to time; if you stare at him, his anger meter will quickly start to fill, only lowering when he is not being viewed. If completely filled, DBGF will shut off all power and make a extremely loud noise in your office, alerting characters to your location. Be careful! | Demonic Blacklight Golden Freddy was sealed in the Trippy Zone by Plush Funtime Freddy, but BGF’s prison seal cracked BGF’s mind terribly, turning him into Demonic Blacklight Golden Freddy who destroyed the pizzeria, causing the Plushie Pizzaria Disaster. |
The Psycho Series[]
| Image | Name | Description | Notes |
| Psycho Dad (Jeffrey Sr.) | Psycho Dad starts at the first Spare Room with his two sons, Jesse and Jeffrey Jr. Soon, he will find his way to the office through either hall to unleash his anger towards you. Close the right door to the right hall he is in. Be careful, because if you're low on oxygen, you won't be able to see him. | ||
| Jesse | Believe me, Jesses hates his dad. A lot. However, he also hates what William did to children, and wants to kill him for that. If you see him running to the office from the left hall, flash the camera light on him to scare him away. Be warned though: closed doors don't work on him. | ||
| Jeffrey Jr. | The Psycho Dad's right-hand son. Jeffrey Jr. will tamper with the oxygen pipes in the supply room so he can help the Psycho Dad run into your office. Administer him a controlled shock to make him stop tampering with the pipes. | ||
| Corn | Corn's a shy guy, peeking his head out from several hiding spots in the cameras, though he doesn't go after the player. |
CrazyMew37's Berry Good Mix-Up[]
| Image | Character | Description | Notes |
|---|---|---|---|
| Kat and Ana | Kat and Ana will be hiding in the Game Area, waiting for you to switch to it. If you switch your camera to the Game Area, then Kat and Ana might lock your monitor to a WarioWare Microgame. Winning it will free your Monitor and give you 1% Power, but losing it will make you lose 3% power. The higher difficulty Kat and Ana are, the more likely they will lock your monitor to do a microgame. |
| |
| Flippy | Flippy starts in the Kitchen and will make a lap around the entire map, leaving Cream Pies all over the place. These Cream Pies will block your camera's view for a few seconds. Flippy's path is Kitchen > Dining Area > Classic Show Stage > Backstage > Ship's Cove > Supply Room > Left Hall > Left Party Room > Game Area > Prize Corner > Toy Show Stage > Parts/Services > Right Party Room > Right Hall > Spare Room 1 > Kitchen. The higher difficulty Flippy is, the longer his Cream Pies will stay on the screen. | ||
| Boo | Boo appears in your office when your oxygen runs low. He will jumpscare you, and make either the Doors, Monitor, or Fan not work for 5-7 seconds. | ||
| Squidward | A poster of Squidward will appear in Spare Storage 2. If his face is normal, then you are safe. If his face turns into Red Mist, however, you have a split second to put on the Freddy Mask or Squidward will jumpscare you. | ||
| Olimar | Some Pikmin will appear around the cameras. Make sure to click on them to make them disappear, or Olimar will come and jumpscare you. | ||
| Luigi | Luigi will appear in the Office once in a while to help you out by making your power-using tools (i.e. doors, lights) only use half the Power than normal. However, if Boo jumpscares you or you put on the Freddy Mask for longer than 3 seconds, Luigi will scream and run off somewhere. |
| |
| Berry | Berry will appear in the Alleyway, counting down from 9. You can hear him counting down from across the building, so when he says 0, use your Heat Button to reset him back to 9, or he will jumpscare you. | ||

|
Dawn | When it reaches 6 AM, close every door, vent, and cranny, or else Dawn will jumpscare you. | |

|
Rosa | Rosa will appear in the Rich Bank, sitting on her throne. She will notify you if she is being watched too much, too little, feels too hot or too cold, or needs more or less oxygen. If you don't do anything to please her, then she will run to your Office to jumpscare you. If she is running to your office, you can't do anything to prevent her from entering. |
|

|
Ethan | Ethan is a part of the Johto Trio. He starts in the Backstage, and will head to your office. However, he is invisible, and the only way to keep track of him is to find his Totodile in the cameras. When he reaches your office, simply close the door on him, or he will jumpscare you. His Pathway is Backstage > Dining Area > Kitchen > Spare Room 1 > Right Hall > Office. |
|

|
Lyra | Lyra is a part of the Johto Trio, who hides in the office. If you hear her giggle, then wear your Freddy Mask to fend her off, or else she will use her Chikorita to attack your Oxygen Meter using Leaf Storm, causing it to lower. |
|

|
Kris | Kris is a part of the Johto Trio. She starts in the Spare Storage, and will then head to your Office. The only way you can tell where she is is the 8-bit Pokémon Crystal music that quietly plays on the cameras. In order to fend off Kris, simply close the door on her, or she will encase every single button in crystal for the rest of the night. Her pathway is Spare Storage 2 > Spare Room 2 > Left Hall > Office. Kris goes much faster the less oxygen there is. |
|

|
Silver | Silver hides in the Saferoom, but every once in a while he will leave to break the cameras, disabling them for a few seconds. A way to prevent him from doing this is to switch the camera to the Saferoom or Bathrooms to scare him temporarily, but this will only work about 95-75% of the time. The higher difficulty Silver is, the less likely he will be scared by the cameras. | |

|
Pete | Pete's Doggo will appear in your office, whining once in a while to ask you for help with finding his bone somewhere in the cameras. Make sure to only give him the White Bone, not the Yellow, Brown, or Beige ones. If you search for too long or give the Doggo the wrong bone, then Pete will jumpscare you. | |

|
Lunick | Lunick is one of the Six Pokemon Rangers. His face will simply appear in the Capture Disc, and pressing it when his face appears will either have him go away, or he will jumpscare you. Pressing the Capture Disc will work 95-100% (88% on Hell Mode) of the time, depending on what AI difficulty he is on. | |

|
Solana | Solana is one of the Six Pokemon Rangers. Her face will simply appear in the Capture Disc, and pressing it when her face appears will either have her go away, or she will use some of your Power for an hour. Be noted that this can be stacked. Pressing the Capture Disc will work 85-90% (78% on Hell Mode) of the time, depending on what AI difficulty she is on. | |

|
Kellyn | Kellyn is one of the Six Pokemon Rangers. His face will simply appear in the Capture Disc, and looking away from the Capture Disc by flipping your monitor will either have him go away, or he will disable your doors for a few seconds. Looking away from the Capture Disc will work 80-85% (73% on Hell Mode) of the time, depending on what AI difficulty he is on. | |

|
Kate | Kate is one of the Six Pokemon Rangers. Her face will simply appear in the Capture Disc, and looking away from the Capture Disc by flipping your monitor will either have her go away, or she will disable your monitor for a few seconds. Looking away from the Capture Disc will work 70-75% (63% on Hell Mode) of the time, depending on what AI difficulty she is on. | |

|
Ben | Ben is one of the Six Pokemon Rangers. His face will simply appear in the Capture Disc, and putting on your Freddy Mask will either have him go away, or he will disable your Flashlight until the hour he was activated on ends. Putting on your Freddy Mask for the Capture Disc will work 65-70% (58% on Hell Mode) of the time, depending on what AI difficulty he is on. | |

|
Summer | Summer is one of the Six Pokemon Rangers. Her face will simply appear in the Capture Disc, and putting on your Freddy Mask will either have her go away, or she will lower your Oxygen extremely low until the hours she was activated on ends. Putting on your Freddy Mask for the Capture Disc will work 60-65% (53% on Hell Mode) of the time, depending on what AI difficulty she is on. | |

|
Hat Kid | Hat Kid sometimes appears under the desk in the office. You have around 8-18 seconds (5 seconds in Hell Mode) to click on her hat to make her go away, or she will break a Time Piece, sending the clock back an hour. A way to know she is there is from her making noise from under the desk. |
|
 
|
Calem and Serena | Calem and Serena take turns each hour, both appearing in the Left and Right Party Rooms respectively. When it is Calem's turn, in order to fill up his Patience eter, you have to keep pressing the X key on his camera. When it is Serena's turn, in order to fill up her Patience Meter, you'll have to keep pressing the Y key on her camera. Failing to do this will have Calem or Serena disable your Flashlight and Monitor for the rest of the night, and/or disable the Doors and Vents for the rest of the night respectively. |
|
Five Nights at Zombies[]
| Image | Name | Description | Notes |

|
Zack Zombie | Zack Zombie usually hides behind the visible part of either hallways. If he plays his iconic jingle, close the door, or you're not going to have a good day. | |

|
Skelee Skeleton | Skelee Skeleton will walk around while making stomping sounds. If you hear really loud stomping next to you, then close the left door, or Skelee will jumpscare you. | |

|
Creepy
Creeper |
Creepy will watch Stick Nodes on his TV. When you see his popcorn bowl empty, you will hear a low growling sound as his eyes slowly appear in the right door. Close it, or he will jumpscare you. | |

|
Nick the
Wither Skeleton |
Nick hangs out in Nether Cove. If his eyes turn white, then shut the door, as white eyes is his way of saying “Time to run!" | |

|
Wesley | Wesley is in the air ducts above you. When you hear a "BANG BANG" sound in the vents, it’s him running for you, so close the vents before he can come out and kill you. |
Five Nights with The Banana Splits[]
| Image | Name | Description | Notes |
|---|---|---|---|
| Fleegle | Fleegle will appear at the left door. If he appears, close the left door to fend him off. | N/A | |
| Bingo | Bingo will appear in the right door. If he appears, close the right door to end him off. | N/A | |
| Drooper | Drooper will appear in the left hallway every 2 minutes of the game. If he appears, the player has two minutes to close the left door before he attacks. | N/A | |
| Snorky | Drooper will appear at the right door. If he appears, he will make a horn honk sound; when you hear that, close the right door. | N/A | |
| Prototype Fleegle | Prototype Fleegle will appear in the vents. If he appears, put on the Freddy Mask to fend him off. | N/A | |
| Shadow Fleegle | Shadow Fleegle will appear at random intervals; if he appears, pull up the monitor to fend him off. | N/A | |
| SOUL | SOUL acts similar to Shadow Fleegle, but gives less reaction time. | N/A | |
| Glitched Drooper | Glitched Drooper acts similar to Shadow Fleegle and SOUL, but with even less reaction time. | N/A | |
| New Fleegle | New Fleegle appears at the left door; if he appears, put on the Freddy Mask. Closing the door will work on him, but slower. | N/A | |
| New Bingo | New Bingo acts the same as New Fleegle, but he takes the right door instead. | N/A | |
| New Drooper | New Drooper enters from the left door; if he appears, close the left door. | N/A | |
| New Snorky | New Snorky acts the same as New Drooper, but he appears at the right door. | N/A | |
| Harmony | Harmony acts like the Puppet, but in Spare Room 1 instead. | N/A | |
| Burnt Fleegle | Burnt Fleegle comes from the left door; if he appears, close the left door. | N/A | |
| Burnt Bingo | Burnt Bingo acts like Burnt Fleegle, but he appears at the right door. | N/A | |
| Burnt Drooper | Burnt Drooper appears in the vents; if he appears, put on the Freddy Mask. | N/A | |
| Burnt Snorky | Burnt Snorky acts as Burnt Drooper, but gives less reaction time. | N/A | |
| Floyd | Floyd appears at either doors; if he appears, close the door he's at. | N/A | |
| 27' Prototype Fleegle | If 27' Prototype Fleegle appears, pull up the monitor or put on the Freddy Mask. | N/A | |
| Insane Drooper | Insane Drooper acts like Springtrap, but moves a bit faster. | N/A | |
| Corrupted Fleegle | Corrupted Fleegle may appear in front of you. If he does, shine the flashlight in front of his face or he'll jumpscare you, causing your Oxygen to drop. | N/A | |
| Corrupted Bingo | Corrupted Bingo will appear at the left side of the Office. If he appears, pull up the monitor, wear the Freddy Mask, or look at the right side or he'll jumpscare you, causing the Oxygen to drop by 10%. | N/A | |
| Corrupted Harmony | Corrupted Harmony will appear at the Rich Bank. If she appears, switch to another camera or she'll block your view for a few seconds. | N/A | |
| Corrupted Floyd | Corrupted Floyd will appear at the Left or Right Hall. If he appears, switch to another camera/turn off the monitor, or he'll jumpscare you, causing the Oxygen to drop by 5%. | N/A | |
| Corrupted Snorky | Corrupted Snorky may appear in Spare Room 2; if he does, switch to another camara or he'll jumpscare you, causing the Oxygen to drop by 8% | N/A | |
| The Newmalagate | The Newmalagate appears in the Supply Room. At random, it will go to the Left Hall. If it gets there, close the left door to fend it off. | N/A | |
| 29' Prototype Fleegle | 29' Prototype Fleegle may appear at a random camera; if he does, switch to another camara or he'll jumpscare you. | N/A | |
| Dreambreaker Fleegle | Dreambreaker Fleegle can appear in the left hall; if he does, close the left door. If you turn the light on or leave the door open for too long, he will kill you. He can be detected by his red glowing eyes. | N/A | |
| Dreambreaker Bingo | Dreambreaker Bingo acts like Dreambreaker Fleegle, but he doesn't kill you when the light is on, and can be detected by his footsteps. | N/A | |
| Dreambreaker Drooper | Dreambreaker Drooper acts like Dreambreaker Bingo, but he takes two minutes to leave. | N/A | |
| Dreambreaker Snorky | Dreambreaker Snorky acts like Dreambreaker Drooper, but he honks when he leaves. | N/A | |
| Dreambreaker Harmony | Dreambreaker Harmony may appear in front of you; if she appears, shine the light at her or turn on the Lamp to fend her off. | N/A | |
| Dreambreaker Floyd | Dreambreaker Floyd may appear in the left side of the office; if he does, turn on the Lamp to send him away. | N/A | |
| 32' Prototype Fleegle | 32' Prototype Fleegle may appear in the right hall; if he does, close the right door to prevent your death. | N/A | |
| Corrupted Insane Drooper | Corrupted Insane Drooper can appear in any camara; if he appears, switch to another camara or he'll jumpscare you, causing the Oxygen to drop. | N/A | |
| Exterminator Fleegle | He'll enter the Office from the Left Door, if he appears, close the Left Door. | N/A | |
| Exterminator Bingo | He'll enter the Office from the Right Door, if he appears, close the Right Door. | N/A | |
| Exterminator Drooper | He'll attempt to enter the Office from the Left Hall, if he appears, close the Left Door. | N/A | |
| Exterminator Snorky | He'll enter the Office from the Right Hall, if he appears, close the Right Door. | N/A | |
| Exterminator Harmony | She'll enter your Office from the vents, if she appears, close the vent until she leaves. | N/A | |
| Exterminator Floyd | He'll enter the Office from the vents, if he appears, close the vent until he leaves. | N/A | |
| 34' Prototype Fleegle | He'll enter the Office from the vents, if he appears, close the vent until he leaves. | N/A | |
| Hooty (Poppy) | She appears in the main hall, if she appears, get rid of her via a controlled shock. | N/A |
More will be coming after FNwTBS6 is complete.
Five Nights at Dry Bones[]
| Image | Name | Description | Notes |
|---|---|---|---|
| Dry Bones | Dry Bones will start off in his Graveyard area before waking up. He will laugh throughout the night, similiar to Freddy, except one thing is different; you must check for how loud his laugh is getting. Once you hear the laugh very clearly, shut the right door to avoid death. | ||
| Red Koopa | Red Koopa will simply walk around in Parts/Services with Green Koopa. Apparently they use that room to hang out. Eventually, Red Koopa will leave. At this time, his eyes will turn red, reflecting his Withered counterpart from Five Nights at Dry Bones 2. Once you see red light coming from the left door, close the door. | ||
| Green Koopa | Green Koopa will follow the same method as Red Koopa, except for three main differences: his eyes will be green instead of red, reflecting his own Withered counterpart, he will go down the right hall instead of the left hall, and when the right door blind spot is covered in green, close the right door. | ||
| Chain Chomp | Chain Chomp will be in Bark Bark Cove. He will act similar to Foxy, except he'll run down the hall even when the player isn’t looking. | ||
| Golden Dry Bones | Golden Dry Bones' attacks are very predictable. When he appears, the plushie of him on the desk (which you can purchase at the shop) will have it’s eyes glow red, before he then appears at a office entrance. To ensure he leaves, keep the lights on until there is no more blood 🩸 on his upper jaw and his eyes have turned white. In the case where he appears at the blindspots, he will twitch. If the lights are on when you make him leave, he will stop twitching after 10 seconds, roar, and then disappear like a ghost. However, if you don’t turn on the lights in those 10 seconds, you will die. |
Five Nights with Froggy[]
| Image | Name | Description | Notes |
|---|---|---|---|
| Froggy | Froggy will appear in the Alleyway and make his way into the Office via the vents; if he attempts to enter the vents, activate the vent lasers to fend him off, but sometimes, the vent lasers will be disabled for one in-game hour and during that time, he'll crawl into the vents. If he appears in the office, turn off the Lamp to fend him off. | N/A | |
| Kitty | Kitty will appear in the Alleyway and make her way into the Office via a secret trapdoor that connects the Rich Bank to the Alleyway; she can be detected by her glowing white eyes at the left side of the Office. If she appears, turn on the Lamp to fend her off. | N/A | |
| Crocco | Crocco will appear in the Alleyway and make his way into the Office via a secret trapdoor that connects the Office to the Alleyway; he can be detected by his growl and a warning sign. If he is detected, turn on the Lamp to fend him off. | N/A | |
| Gnomes | Gnomes act the same as the Puppet and Harmony, execpt they appear in the Alleyway. | The Gnomes are three characters, even though they are the same character on the roster. | |
| Plush Froggy | Plush Froggy will try to enter through the left door. If he appears, close the left door. | N/A | |
| Cotty | Cotty will appear in the vents; if he does, seal the vents to fend him off. | N/A | |
| Plush Crocco | Plush Crocco acts the same as Cotty, but is a bit faster. | N/A | |
| Cheburashka | Cheburashka acts the same as Cotty and Plush Crocco, but is a bit slower. | N/A | |
| Draco and Snaky | Draco and Snaky will appear at the right door; If they arrive, close the right door. | Draco kills the player while Snaky does nothing. | |
| Mighty Dragon | Mighty Dragon may appear in the middle of the Office. If he appears, shine your flashlight at him or he'll jumpscare you, causing the Oxygen to drop. | N/A | |
| Golden Froggy | Golden Froggy may appear in the Office. If he appears, pull up your monitor or he'll kill you. | N/A | |
| Ghost of Lorenzi | The Ghost of Lorenzi can appear in any camera; if he does appear, turn on the Lamp or he'll jumpscare you, causing the Oxygen to decrease by 10% | N/A | |
| Ghost of Sophie II | The Ghost of Sophie II acts the same as the Ghost of Lorenzi, but gives less reaction time. | N/A | |
| Nir | If Nir appears at the left side of the Office, turn off the Lamp. If she appears at the right side of the office, turn on the lamp, if she appears in front of you, put on the Freddy mask. | Nir's AI is similar to Corruptus from Five Nights at Treasure Island. | |
| Phantom Nir | Phantom Nir may appear in the office; if it does, turn on the Lamp or it'll jumpscare you, causing the Oxygen to drop by 8% | N/A |
Noah's Nightmarish Crawlers[]
| Image | Name | Description | Notes |
|---|---|---|---|
| Buck | Buck takes on the appearance of his TNAB 12 appearance, missing his left forearm and everything. He acts in an unique pattern, staying hidden, but when he appears in the Office, the player must stay still, or else he'll jumpscare them. Buck starts in the Parts/Services room, then goes through a vent to one of the Party Rooms, and finally enters the Office. | ||
| Noah | Noah mainly just does nothing, but when he shows up in the Office, he'll steal an item, especially a Death Coin, and use it against you, though they only have an 1/128 chance of working most of the time. Noah mainly starts in the Dining Area. | ||
| Anna | Anna acts as a slower version of Noah, but she doesn't steal one of your items; rather, she steals 5% of your Power. Each time she does this, it increases Buster's AI. Anna starts in the Dining Area, fitting her waitress-like appearance. | ||
| Bailey | Bailey acts more or less like her TNAB 1 counterpart:she runs down either of the Hallways, and when she appears in the office, the player must put the Freddy mask on in time or she'll jumpscare them. | ||
| Buster | Buster acts as a fusion between Buck and Bailey; he starts out in the Parts/Service room by himself, and he can enter from any of the office entrances save the right door. Instead of staying still, the player simply has to flash a light at Buster, causing him to malfunction. He gets more aggressive throughout the night if Anna's active, due to Anna stealing some of your power to increase his difficulty. |
Three Days With Jester[]
| Image | Name | Description | Notes |
|---|---|---|---|
| Jester | Jester first appears in the 90's Area, and wanders around in an attempt to reach your Office...though he's clumsy and may go to the wrong rooms. Sound can attract him away from you. | ||
| Rally | Rally first appears in the 90's Area, and will crawl into one of the 90's vents to get to your Office. If 90's vent doors are closed on her, she'll go back to the 90's Area. | ||
| Ally | Ally acts similar to Jester, but he won't get lost, is faster, and can get even faster the more power is in use at once. | ||
| Rabbit Of The | The Rabbit of the Shadows will randomly appear in your office. Quickly pull your monitor up before he creates his arms and ends you. |
Five Nights at X's[]
| Image | Name | Description | Notes |
|---|---|---|---|
| X The Singer Reploid | X will walk through the Left Hallway in 4 stages:
You must close the left door, otherwise he will attack and end your night. |
In the Halloween DLC, X gains a Joseph Suit skin.
| |
| Zero the Guitarist Reploid | Zero will stand in the Office, deactivated. However, when he re-activates, he will ask you to repeat a note that he strums on his guitar. You need to correctly repeat how he plays the note on his guitar by strumming the same way he does with the cursor, but if it is incorrect, he will attack. | Zero may get replaced by NightBurr Zero.
| |
| Alia the Cooking Reploid | Alia sits in the Kitchen, baking a cake for ya! However, some of her pets are trying to eat it. If the player doesn't stop her pets from eating it by alerting her to them, or don't accept her finished cake, she will attack them. | Alia may get replaced by Nightburr Alia.
- After jumpscare -
- After beating night -
| |
| Axl the Pirate Reploid | Axl sits in the Bay, but if he is not watched at all, he will attack. Unlike Foxy, however, he will fall into 6 parts and try to enter the office through all the entrances. If all the parts get into the Office, then he will attack. | In the Halloween DLC, Axl wears a Bruno Buccilleti suit.
| |
| Layer the Gift Reploid | Layer sleeps in her Prize Box, that functions like the Puppet's Music Box, but is wound up by being looked at;If you don't wind the Prize Box up enough and let it stop, Layer will come after you, and cannot be stopped from ending your night. | Death Quotes
| |
| Withered Spring X | Whitered Spring X sits in Parts/Services, but he will eventually start to play a game on his PC like Toy Freddy once did. However, this will drain your Power, so you'll need to give him a Controlled Shock to stop it early. If you don't do this, he will drain 50% of your Power before finally stopping. | If Toy Freddy is active, then the two will argue over who can play on the PC.
- While arguing with Toy Freddy -
| |
| Withered Spring Zero | Whitered Spring Zerio will come from the vents; if he comes closer, you will see his mouth and hear his breathing. Close the door of the vent he's at, or else. | Death Quotes
| |
| Withered Spring Axl | Whitered Spring Axl will slide through the hatch while you monitor the cameras, though you will hear that she is close. She will come from either of the doors, or from the vents. You have a short period of time to put on a mask in order to deceive her, otherwise a jumpscare and Game Over will not take long to come. | Death Quotes
| |
| Withered Redbear | Whitered Redbear will sit in the Office, but will periodically start dancing, creating noise. Use the Controlled Shock on him, to stop his noise! | ||
| Withered White Rabbit | Whitered White Rabbit will stand on stage, but will eventually run for your left door. If you close it, he will attack from the vent instead. Use a mask when he attacks there. | Death Quotes
| |
| SHADOW BEAR/
Shadow X |
Shadow Bear will try to enter the Office and attack you from either hallway, while randomly teleporting though other rooms. Not only this, but he will also attack closed doors, draining power even more. | Death Quotes
|
CaneTheVelociraptor's Crew[]
| Image | Name | Description | Notes |
|---|---|---|---|

|
Cane the Velociraptor | Cane will sit in the Backstage and play Sonic Mania. Since the game has a lives system, he has three tries to play all the levels. If he loses all of his lives, restart his computer by pressing the button near the map, or else he will drain your power rapidly. | |

|
Shade the Porcupine | Shade will be in the Kitchen at first, but he will then try to find food in the Office, entering from either the left or right doors. Close the opposite door and let him into the office, or else he will tamper with the Oxygen Machine. | Shade will sometimes go back to the Kitchen for the rest of the night, realising there is no food in the office. |

|
General Grievous | General Grievous will start in the Alleyway. If he looks at the camera, you are safe. If he is not looking, however, that means you need to find 4 lightsabers, which will appear on random cameras. If you don't find the lightsabers in time, he will summon his MagnaGuards:one will prevent you from using your cameras, the other will prevent you from using the Heat Button. | |

|
Red Eyes | Red Eyes will start in Parts/Services and move closer and closer to the office, entering it from either the right or the left doors. Use your flashlight to make it move back to the camera it had just been on. If Red Eyes reaches the office, it will kill you. | If flashed in Parts & Service, it will just twitch and make a gargling, almost static-like noise. |
TheSpongeBro133's Cowabunga Mashup[]
| Image | Name | Description | Notes |
|---|---|---|---|
| Jake Jazzdog | Jazz will start in the Game Area, before taking the most direct route to the player. The player must close the door he at some point arrives at. | ||
| Woofer | Woofer will start in Ship's Cove. He will then take the direct route to the player after opening the curtain. The player must close the door he arrives at. |
Misc.[]
IDK why these guys are here, but here they are.
| Image | Name | Description | Notes |
|
Boofie | Boofie will start in the Safe Room; when he leaves, he will rush to
either the left or right hallway. If you hear squeaks, close the left door. If you hear an alarm, close the right door. Failing to do so in time will cause Boofie to appear on your office desk, acompanied by hallucinations, as well as not being able to close the doors, put the mask on, or use the lights. After 1-3 seconds, Boofie will jumpscare you. |
Looking at Boofie on the cams for 2 seconds will send him back 1 cam. This can only be done 2 times. Boofie will head to the Dining Area before charging to a hallway. |

|
Tabby Slime | Why... Anyways, if Boofie is active, Tabby Slime will mirror Boofie's actions (ex. If Boofie charges down the right, Tabby Slime charges down the left). If Boofie is inactive, he will make his way to your office in any way possible. When he gets in, a jumpscare will be all you get. Look at him through the cams to slow him. | To slow Tabby Slime, you need to look at him for 2 seconds, which sends him back a camera. |

|
Freddy Frostbear | Freddy will jumpscare you if the office gets hotter than 85 degrees. | You can use the heater or mask to stun Freddy, but he'll jumpscare you soon after! |

|
Perry the Platypus | YOU KNOW WHAT? I GIVE UP TRYING TO EXPLAIN THIS!!!!!!!!!!!!!! | I'm going crazy at this point. |
| Dawko | When you hear him say "Your going to get rekt by a agressive Dawko!", turn off the lamp and put your mask on. When Dawko turns the lamp on, he'll see you with your mask on and run away because he doesn't wanna be jumpscared. | i give up trying. | |
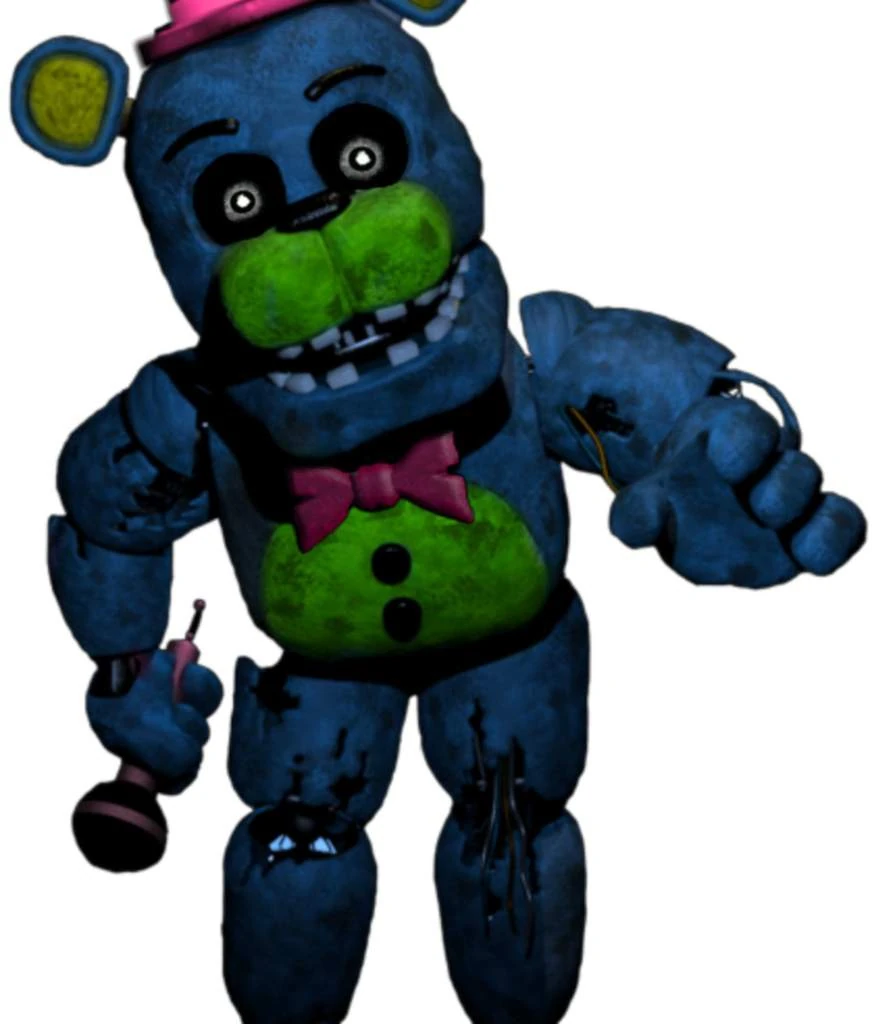
|
Blacklight Withered Freddy | Blacklight Whitered Freddy will randomly scream one of two things. If he screams "R U READY FOR FREDDY?!?!", turn off the lamp until you see Blacklight Withered Freddy dash by your office. If you hear him sceam, 'HEY BON BON, LET'S GO KILL FRICKEN FAZBEAR HE MADE MY COUSIN SCREAM, HA!", administer a control shock down the right hall. | God help me. |

|
Bendy | When you hear banging, quickly press up to crawl through the vent above you. Be careful though, as Bendy AND Boofie will be chasing you! |
Five Nights at the Money Bin Squad[]
| Names | Mechanic | Notes |
| Animatronic Scrooge
McDuck |
Scrooge will appear in your office at times. If his eyes are green, you need
to give him 5 Faz-Coins. If they are yellow, 10. If they are red, 15. |
You can also just put your mask on if you don't have enough Faz-Coins to pay him. |
| Animatronic
Huey, Dewey, and Louie. |
All three ducks will appear in the vents, so make sure to check them often. If they get in, they will start to drain your power. Flash your light to make them go away. | Even if they get in, you can use your mask to make them think nobody's inside. |
| Animatronic
Donald Duck |
Donald will appear in your office at times. Click him to play a minigame and make him go away. If you don't click him in time or fail the minigame, you will get jumpscared | If Donald appears under the desk, that means he took your mask! Click him 15 times to get it. |
Totally Accurate Battle Simulator[]
| Name | Description |
|---|---|
| Clubber | He starts in the Alleyway. Like usual, he will walk to one of the random halls that connect to your office and try to kill you. Use the doors to stop them. |
| Protector | Don't worry, he's not gonna hurt ya! He will start in the Alleyway and walk to your office. When he's inside, he will ask for 3 Faz-Coins. If accepted, he will block either the left hall or the right hall, protecting the player until an enemy stops into the appropriate hall and leave upon seeing Protector, in which he'll make his leave until next time. If denied, well, he just leaves until next time. |
| Spear Thrower | From the Alleyway, he will randomly run to one of the halls and throw his spear directly at the Lamp, breaking it, and giving Froggy and his friends a BIG advantage, and this time, no matches can fix it! To prevent this, close the appropriate door to block his spears. Sadly, he will come back with a new spear. |
| Raptor | Same as the Chieftain, but he's faster, which means that it'll be much harder for you to catch! |
| Stoner | He will leave the Alleyway, and teleport into one of the halls, ready to throw his stone. While it may look nice, trust me, he could put a HUGE damper to your night! He will throw his stone directly at the office light, breaking it and draining entire power, and the vent minigame can't save you, giving EVERYONE big advantages! Close the appropriate door immediately! |
| Bone Mage | He starts in the Alleyway and will walk into one of the halls. When you see him in a hall, now's the time to give him the controlled shock of a lifetime! Oh, and don't try to close the door! He can just summon a line of bones that hijack the door up anyway, as the bones shrink down to the ground. |
| Chieftain | He will run from the Alleyway and straight to your office through one of the halls. If you see him running to your office, close the appropriate door immediately! |
| Raptor Rider | Same as Chieftain and Raptor. |
| Mammoth | They start in the Alleyway, but that's not all! Randomly, they will teleport into one of the entrance halls and block it for the current hour, blocking any enemy coming in the hallway, so yeah, Mammoth is basically a helper, and the enemies can't get to you since the Mammoth is blocking them, can't they? |
| Name | Description |
|---|---|
| Peasant | They start in the Alleyway. Basically, they will wander around and try to get to your office. Basically, closing the appropriate door is a good way, since they are slow. |
| Banner Bearer | He will start in the Supply Room and wander around. Once he sees one of your enemies, he will distract the enemy with a cyan halt. So, yeah, he's a helper, don't worry!~ |
| Flag Bearer | Banner Bearer's rival! He comes from the Supply Room too, and he will wander around too. But, he's not the same as the Banner Bearer. When he sees one of your enemies, he will increase the enemy's speed, making it a little harder for you to catch them. Administer him a quick control shock to send him back to the Supply Room! |
| Poacher | What a thief he is! He will come from the Alleyway and run around the map. When you see a Faz-Coin in the room he's in from the cameras, he will quickly shoot an arrow at the Faz-Coin stealing it. Don't let him steal it and quickly grab it before he gets the chance! |
| Blowdarter | He sleeps in the Left Hall for a bit, before randomly showing up in your office and shooting a blow-dart at you, making your vision green and blurry, slowing you down, and sometimes, decreasing your oxygen meter, not knowing that he leaves after he shoots. Put up your camera panel quickly to protect yourself! |
| Pike | He starts in the Alleyway and makes his path to your office. Once you see his very-long pike poking out from one of the doors, close the appropriate door immediately, as the pike will retreat when it closes. |
| Barrel Roller | He starts in the Alleyway and rolls his way to your office, never stopping. Close the appropriate door to stop him from killing you! OH, and at a low chance, when he's stopped by the door, his barrel will explode and kill him, deleting him from the rest of the night. Oh, and when an enemy is in the hall he's in when his barrel explodes, they will retreat! Pretty cool, huh? |
| Boxer | Shh! He's is currently training at the Parts and Services for a little bit, before coming to your office and knocking you out! Close the appropiate door to stop him, and when he's blocked, he will punch the door a couple of times before going away. |
| Pharaoh | From the Safe Room, he will come to your office and put you into a deep sleep behind a ring of yellow, pharaoh-kneeling energy. The deep sleep will give your enemies an advantage, and it will last for 7 seconds, with the aftermath setting your oxygen meter to 0%. Put on the Freddy Mask before he does his thing, and he will go away! |
| Wizard | He starts from the Rich Bank and wanders around, not caring about killing you and going to your office. When he sees an enemy, he will zap the enemy and put them into paralysis, disabling them for 5 seconds before they restart. |
| Chariot | They will run from the Alleyway and ram strait to your office with his trusty horse. Close the appropiate door to stop them! |
| Thor | As cute as he may look, trust me, he's DANGEROUS! He will start at the Left Party Room and wander to your office. When he reaches your office, he will create his "cast spell" pose, and before you know it, the office light will flash bright-cyan and go out for 8 seconds, giving your enemies a great advantage! Use your Freddy Mask to fend him off! |
| Tank | This big tank and its crewmates will swoop from the Alleyway and drive to one of the halls. When you close a door and they get the chance, they will quickly shoot the bullet at the door, destroying it for the rest of the night and giving door-based enemies a BIG advantage! Give them a controlled shock to stop their plan! |
| Super Boxer | Same as the Boxer, but he's faster and he has a new move! When the door he's punching takes about 25 punches, the door will break and he will kill you straight-away! Give him a controlled shock to fend him off! Don't worry, the door refixes itself slowly. |
| Dark Peasant & Super Peasant | 'Aight, here's where it gets interesting.~ Dark Peasant and Super Peasant will randomly switch turns in the Ship's Cove when you leave the cameras and the current player's plush sits on the office desk until it's the other friend's turn. It goes on repeatedly, and the cycle can't be stopped. EVER.
Dark Peasant: If you look at him right away, he will command his hands of darkness to grab the camera and break it with a snap, disabling the camera for 15 seconds. Oh, and when you give someone a controlled shock, he will delay Super Peasant's turn and try to kill you. When you see his barrage of dark magic flying from the hall he's in and hitting the opposite door, surprisingly not breaking it, now's your chance to close the appropriate door on him. Super Peasant: If you don't look at Ship's Cove for long, he will rush out from the cove and fly straight to your office to kill ya, with no way to stop him. Don't even think about closing a door on him either! He can just break it open! |
Cman's Psychos[]
| Image | Name | Description | Notes |
|---|---|---|---|
| Cman | Cman begins in the Office asleep. He will randomly wake up and ask for a random amount of Faz-Coins so he can play some arcade games. If you don't give him his Faz-Coins in time, he'll end your run with a jumpscare! He will be gone for the rest of the night once you give him his Faz-Coins. He also will leave the office if Dee Dee's game is turned on, but will come back as soon as it is turned off. | ||
| THE MAN
BEHIND THE SLAUGHTER |
The Man Behind the Slaughter will randomly appear in the office playing The Living Tombstone's FNAF 2 song, creating a LOUD audio disturbance. Click his badge to make him go away. | ||
| SMG4 | Don’t worry, SMG4 isn’t here to attack you; all he wants to do is sit in the Game Area and watch memes! As a bonus, the memes he's watching create a loud audio distraction, attracting animatronics to him. Unluckily for you, SMG4’s computer is almost dead, causing him to need to plug it in, which also causes your power to drain faster. If you don’t want him to do this, click on his hat and he’ll run off! | ||
| Scrap
Whitered Bonnie |
Scrap Whitered Bonnie will begin in the alleyway, deactivated. Overtime, he will slowly start to stand up unless, of course, you flash him with the camera light to make him sit back down. If he does get up, however, he will become an even more aggressive Springtrap. Just like Springtrap, he will be affected by audio, but he now has a 10% chance of ignoring it. | ||
| Balloon
Demon Child |
Balloon Demon Child will begin in the Game Area. Once per night, he will enter the vents and make his way towards you. Once he gets into the vent blindspot, put on your mask to send him away! If he does get into your office, however, he will deactivate all of your systems for the ENTIRE night, leaving you completely defenseless. |
Friday Night Funkin'[]
| Image | Name | Description | Notes |
|---|---|---|---|
| Boyfriend | Boyfriend and his ex-boyfriend, Pico, will repeatedly do rap battles, along with Girlfriend sitting on the sound-making speakers, all beside Ship's Cove. Randomly, BF will emit a high-pitched note that will greatly increase the noise in your office, giving Music Man a good advantage. Quickly give him a controlled shock when he emits it to stop the noise. | ||
| Girlfiriend | Don't worry, she's not gonna hurt ya. She just wants to listen and interact with her silly boys.~ | ||
| Pico | Along with rapping with his ex-boyfriend, BF, Pico will randomly shoot out a high-bouncing bullet that bounces straight to your vision, breaking your eye and blurring your vision. Don't worry, the vision and the eye will heal. |
FNAF: Freakshow[]
| Image | Name | Description | Survival Tips |
|---|---|---|---|
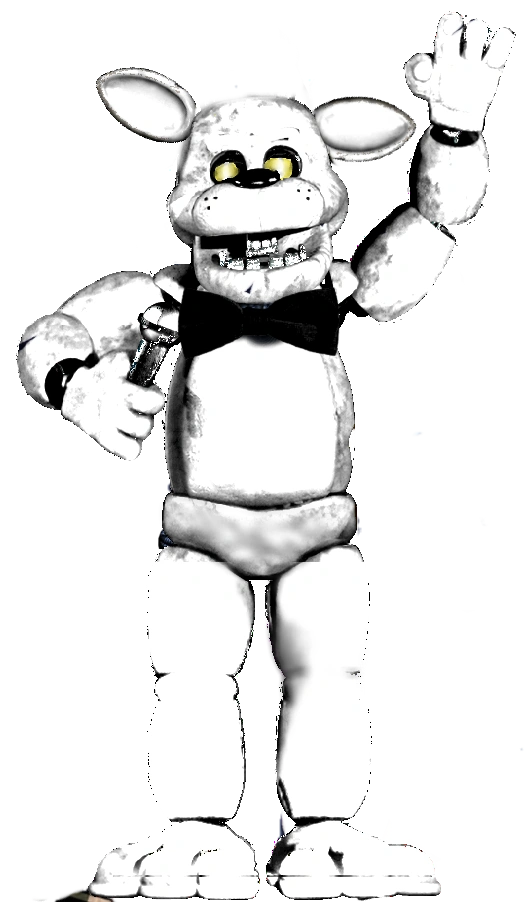 |
SunBun | Watch out! SunBun can hide anywhere! | Listen for a glitchy giggling noise, and close the vent before she dives through |
 |
Chipped SunBun | SunBun, but with a little weight off her chest | Listen for loud banging and close the vent or door she's coming through |
 |
Refurbished Fredbear | Fredbear, rebuilt as an animatronic for the Freaky Fazbear's location | Listen for loud, slow stomping and turn the flashlight over to the door he's coming to |
 |
Refurbished Spring Bonnie | Spring Bonnie, rebuilt as an animatronic for the Freaky Fazbear's location | Spring Bonnie isn't very aggressive. You'll see Spring Bonnie once or twice a night. Just close the door |
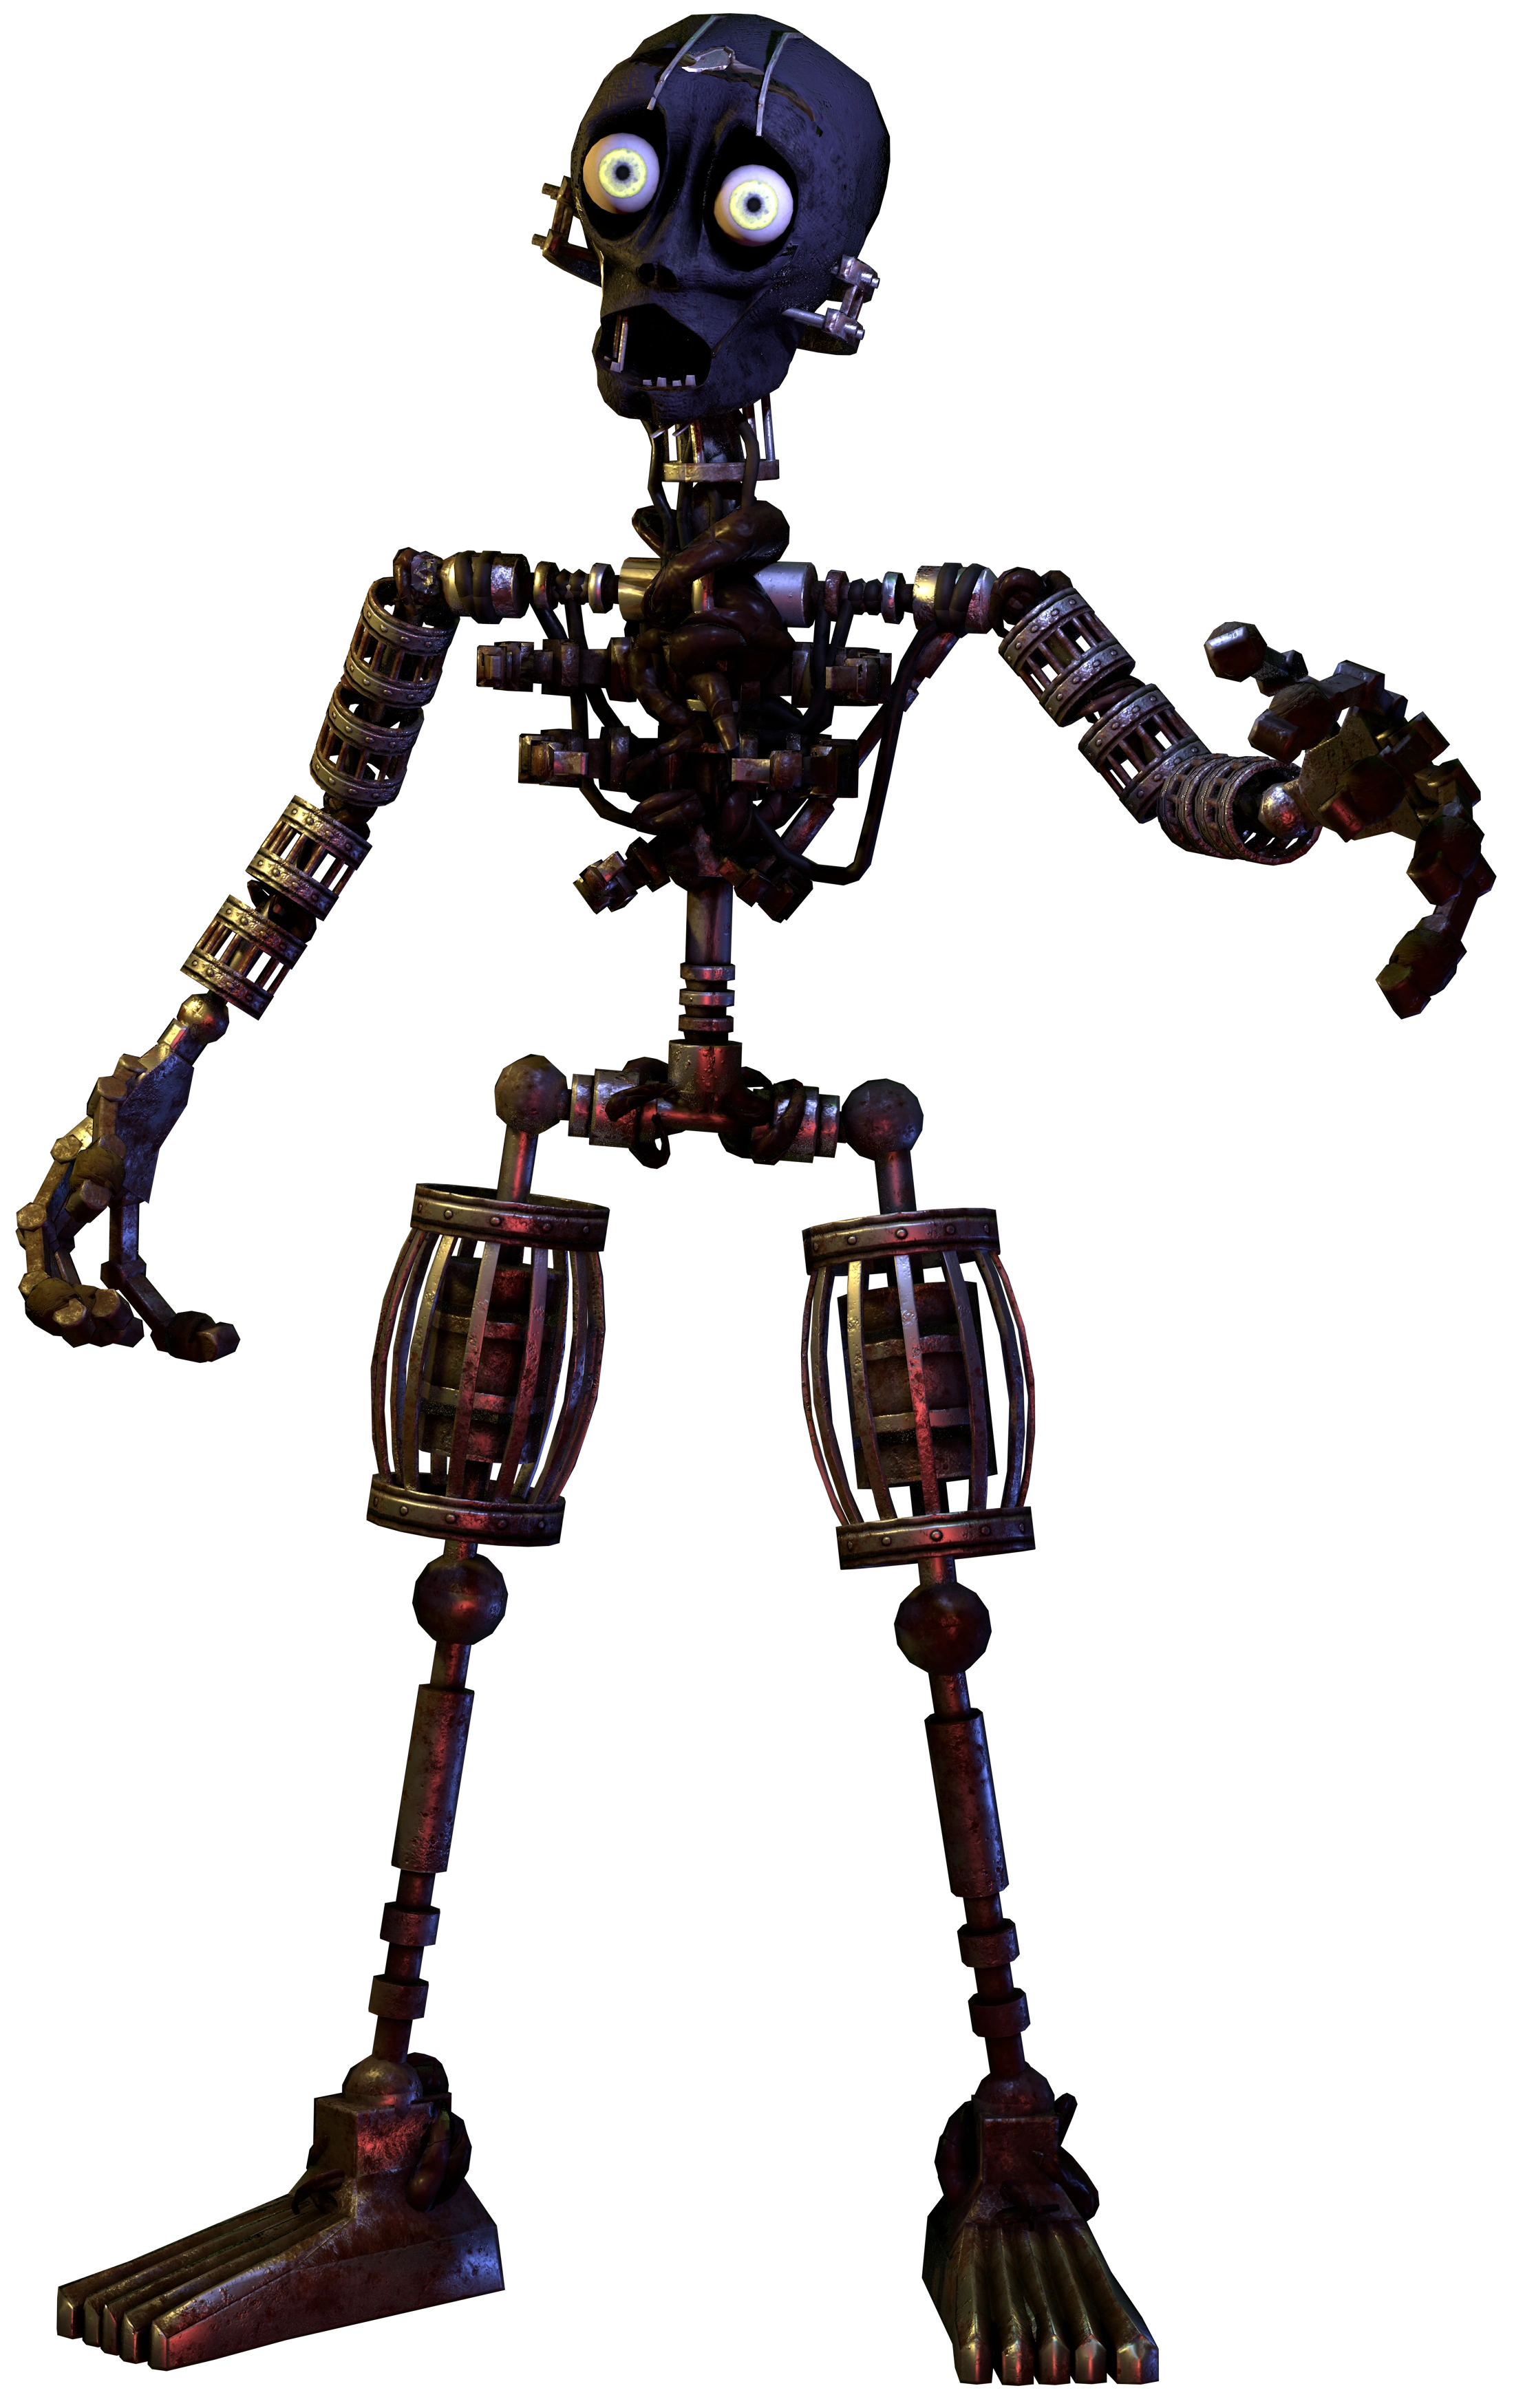 |
Baretrap | When you thought he couldn't get any worse | BareTrap will summon words on your screen like "Maddox" and "Stomp". Click on them to send BareTrap away or the words will flood your screen then you'll be jumpscared |
In-Game Mechanics[]
- Camera
- The traditional camera reappears in this game. It can view nearly every room except the Safe Room, Funtime Bunker and Nightmare Storage.
- Control shocks can be sent through certain rooms. These being the two vents, Right Hall, Game Area and Parts/Services.
- Children sounds can be played throughout the entire map.
- Doors
- The Doors from Five Nights at Freddy's 1 return. They can be shut and opened.
- The doors run on an independent power source. If no doors are closed, the power refills itself but if any door is closed, it'll drain.
- Also can expose the halls with lights.
- Hall door for Zombie
- Vents
- The Vents from Five Nights at Freddy's 2 return and act exactly as they did.
- The only vents that work differently are the ones used to get rid of Wesley,as those have doors on them.
- Flashlight
- The flashlight returns and acts exactly as it did in Five Nights at Freddy's 2.
- Freddy Mask
- The Freddy Mask returns from Five Nights at Freddy's 2. If you wear it, your oxygen meter will go down, but it can ward off animatronics.
- Oxygen Meter
- Oxygen is a key component in this game. It starts at 100% at the start of the night. Using the mask, being jumpscared by a Phantom or if the oxygen machine is tampered with will cause it to drain. The lower the oxygen, the more prone you are to Hallucinogen Animatronics.
- Adventure Endo-01s, Minireenas, Springtrap, and Lyra can tamper with the Oxygen Machine found in the Right Hall. Minireenas will stay there until being zapped by a control shock.
- Hallucinogen Animatronics include: Golden Freddy (and Withered), the Shadow animatronics, the Phantoms, the Nightmares, Yenndo, Lolbit, Boo, Mighty Dragon, Ghost of Lorenzi, the Corrupted Splits and Ghost of Sophie II.
- The oxygen meter will refill when it's not tampered with or when you're not wearing the mask.
"Lamp"
- The Lamp is a key item to surviving Froggy and his friends. It can be turned off by clicking on it or turned on by using a matchstick (Maximun total of matches is 99).
- Used to fend off Froggy, Kitty, Crocco, Blacklight Withered Freddy (only if he decides to run through the left hall) Ghost of Lorenzi, Ghost of Sophie II, Dreambreaker Harmony, Dreambreaker Floyd and Dawko.
- XOR Repellent
- This can only be used once per night. Whenever XOR is about to appear, quickly click on her before she finishes her song to get her to go away. She will, however, reappear in an hour. (If you used it on her at 2am she would reappear at 3am
- Colored Buttons
- A set of Five Flashy, Multicolored Buttons. They are used to fix the monitor and repel Simon.
- Heat Button
- An orange button with a sun icon on it, placed beside the left door. It is used to fend off Berry with heat.
- 90's vents
- Appears right above the normal vents if Rally is on, used to fend off Rally.
- Capture Disc
- A Capture Disc from the Pokemon Ranger series will appear on the wall of the office. Pressing, Looking Away, or Putting on the Freddy Mask in front of it can repel the Pokemon Rangers. Be noted that you have a small chance that the method of Repelling the Rangers won't work 100% of the time.
"Restart Computer" Button
- A button that appears on the Backstage camera.
- Used to stop Cane from draining power.
Vent above the office
- Used if the power goes out.
- When you hear squeaks, stop until the squeaks stop or Boofie will attack you.
- If you take to long, Bendy will rush in. Hold SHIFT to run faster
- Pressing S moves you forward
- Reaching the end of the vent fasts forward time by 1 ingame hour and restores 255 power. (50% if you have Origin Sonic robot)
Faz-Coins
- Found randomly on cameras.
- Click them to collect them.
Shop[]
Unlocked when you purchase Yoshi from the Animatronic Lab. Purchasable for $1991reset
Animatronic Lab[]
The Animatronic Lab is basicly a way to unlock new animatronics.
| Item | Description | Price |
|---|---|---|
| Kids Drawing | An infinite supply of kids drawings. | $10 |
| 90s Celebrate Poster | A poster of Freddy, Bonnie and Chica from the 90s! | $50 |
| '87 Celebrate Poster | A poster of Freddy, Bonnie and Chica from 1987! | $50 |
| Misfit Poster | A poster of Mangle, Balloon Boy and the Puppet! | $50 |
| Music Box | Just what it sounds like. Click on it to change it between OFF, Toreador, Pop Goes the Weasel, and Crumbling Dreams. Complete Fazbear Fever to unlock a version of "Five Nights at Freddy's" by the Living Tombstone. | $50 |
| Fazbear Fright Posters | Some posters salvaged from Fazbear Fright. | $50 |
| Sister Location Poster | A mysterious poster with Circus Baby on it. | $50 |
| Broken Family Poster | A strange poster with a strange portrayal. | $50 |
| Fazbear Tophat | Freddy's top hat, passed down through generations and never tattered! | $75 |
| Electric Guitar | A refined Bonnie staple, the red Electric Guitar. | $75 |
| The Cupcake | The iconic cupcake held by Chica herself. | $75 |
| Pirate Hook | A real Pirate shows his appreciation by having the captain's hook. | $75 |
| Microphone | A simple microphone that one must bear. | $75 |
| Purple Tophat | An odd purple tophat... you remember it from somewhere.... | $80 |
| Halloween Jack-O-Lantern | For that Halloween spirit, huh. | $90 |
| Freddy Plush | A plush of Freddy Fazbear! | $100 |
| Bonnie Plush | A plush of Bonnie the Rabbit! | $100 |
| Chica Plush | A plush of Chica the Chicken, cupcake too! | $100 |
| Foxy Plush | A plush of Foxy the Pirate Fox! | $100 |
| Mangle Plush | A plush of the vixen, Mangle! | $100 |
| BB Plush | A plush/figurine of Balloon Boy! | $100 |
| JJ Plush | A plush/figurine of JJ! | $150 |
| Toy Bonnie Figure | A figurine of Toy Bonnie. | $150 |
| Funtime Freddy Plush | A plush of Funtime Freddy and Bon-bon! | $150 |
| Golden Freddy Plush | A plush of Golden Freddy! | $200 |
| Fredbear Plush | A plush of Fredbear! Basically just a recolored Golden Freddy. | $200 |
| Spring Bonnie Plush | A plush of Spring Bonnie! | $200 |
| Shadow Freddy Plush | A plush of Shadow Freddy! | $200 |
| Metal Freddy Plush | A plush of Metal Freddy! | $200 |
| Ennard Mask | A mask of god knows who. | $250 |
| Little Figurines | Tiny figurines of Freddy, Bonnie and Chica. | $250 |
| Discount Ball Pit | A pizzeria staple. We didn't say it was safe. | $300 |
| Lemonade Clown | What? He was cheaper than Fruit Punch Clown. | $390 |
| Prize King | Swolethon. | $400 |
| Let's Party Banner | Wanna party! (I promise, it won't attract chickens.) | $450 |
| Freddy Stand | A salvaged stand of Classic Freddy. | $500 |
| Bonnie Stand | A salvaged stand of Classic Bonnie. | $500 |
| Chica Head | A salvaged head of Classic Chica. | $500 |
| Foxy Stand | A salvaged head of Classic Foxy. | $500 |
| Box of Toys | What can you use? There's a box of toy animatronic parts. | $750 |
| Pickles | Caution: Might have something lurking inside. | $800 |
| Exotic Butters | Perfect with Eggs Benedict. | $1000 |
| MOTHERTM | Have fun with this copy of the game MOTHER! It will show footage of the famous RPG on one of the monitors. | $1000 |
| Rick Plushie | You seem to really like his fake girlfriend stories... That or you like having your frontal lobe being bitten off. | $1337 |
| Arcade Bunny Plush | He's so adorable! Too bad he is so annoying... | $1500 |
| Gary the Gadget Guy Plushie | Remember back when Club Penguin used to exist? Good times... | $2000 |
| Pyramid Head Plushie | A plushie of Pyramid Head from Silent Hill! He looks so cute! | $2000 |
| Golden Fan | Watch the fingers. It bites. | $3500 |
| Gold Freddy Trophy | A Freddy Trophy made of Solid Gold. Not to be confused with a trophy of Golden Freddy. | Beat "Ready for Freddy?" |
| Golden Freddy Trophy | A trophy of Golden Freddy. Not to be confused with a Freddy Trophy made of Solid Gold. | Beat Ready for Freddy?, then buy it for $1987. |
| Golden Bonnie Trophy | A Bonnie Trophy made of Solid Gold. It seems to be missing something...maybe a pair of maracas? | Beat "Down the Rabbit Hole" |
| Golden Chica Trophy | A Chica Trophy made of Solid Gold. After all, you can't forget everyone's favorite animatronic...Mr. Cupcake! | Beat "Chicken Run" |
| Golden Foxy Trophy | A Foxy Trophy made of Solid Gold. Don't let it scare you. | Beat "Foxy Foxy" |
| Shadow Dee Dee Plush | Beat "Cupcake Challenge" | |
| Shadow Bonnie Plush | RXQWSAFSKAXC | Beat "Fazbear Fever" |
| Shadow Freddy Plush | hehe | Beat "Golden Freddy" |
| Mysterious Key | Ǎ̸͕l̶͎̀ľ̵̘ ̷̖̏a̸̭̾ć̷͜t̶̤͌i̵̛̺o̶̗͠n̵̩͗s̶̺̈́ ̴̨́h̸̦͛a̵̧̿v̶̢̐ė̸ͅ ̴͍͊c̶̡͠ȯ̶̞n̴̰̽ŝ̶̮ẻ̷̗q̸̯̓ü̵̲e̷̘̚n̵͕̔c̵̛͇e̶̹̍s̸̗͊ | $9999 |
| Golden Virtual Boy | "
-.. .. -.. / -.-- --- ..- / .-. . .- .-.. .-.. -.-- / - .... .. -. -.- / .- / --. .-.. --- .-. .. --- ..- ... / --. --- .-.. -.. . -. / ... - .- - ..- . / --- ..-. / -- . / .-- .. .-.. .-.. / ... - --- .--. / -- . ..--.. / -.-- --- ..- / .-- . .-. . / .-- .-. --- -. --. .-.-.- / -.-- --- ..- / ... - .. .-.. .-.. / .... .- - . / -- . --..-- / .- -. -.. / .. / -.- -. --- .-- / .. - " (I'm afraid that you will have to translate yourself.) |
Unlocked when beating Hell Mode, is only $5 |
| ??? | G̷͔͕̓̉̄̑s̴͕͖̹̆̍͘f̵͙͚̋̍͘ẹ̸̡͙̮̓͒̕c̶̣͎͋̈́̌f̷̢̠͈͔̍ḅ̸̮̝͋s̵͇̼̍̇̾͑'̷̨͓͓̏̈́̈͒t̵͚̺̗̿̌̀ ̴̢̻̬͌̒͊G̸͈̑͐b̵͖̎n̷̩̙͙͠j̸̺̣̳̞͘͝m̶̯̝̙̀͠z̴̞̞̲̦̈́̍͗ ̵͇̊͠E̶͉̹̓̈́̓͝j̴̲̼͚̀o̸̯͈̎̔̾͒͜f̸̞͉̥̎s̴͇͚̪̭͠:̷̙̝̗̃̽̊ ̴̤̯͍͔͌͗X̵͇̀ī̴̡͈͇̑̌̊f̸͉̒̃̋͗s̷̺̹͚̬͑̌̿f̵͍̾̏̈́ ̵͙̄̒͗̆G̸̡͍̘͐b̵̢͙͚̟̀̀̂̚o̶̡͉̜͌̍̈́u̷̚ͅb̸͚̱̼͍̿t̵̻̻͇̓̉z̸̺̥̓̔̚͝ ̶̛̖̯̀̈́̽b̶̲̹̺͌͝ȍ̴͇͇̻͎̀̄͠ë̵̛̝̗̌̈́ ̴͓͝Ǵ̵̙͑v̴̪̙̬̿o̸̺͗ ̷̻́͐D̸̖̠̰̏̇p̸̻̻̝̮̿̈́n̸̘̄ͅf̶̗͆̓̀ ̴̰̲̮̈́̔̈́ͅü̷̱̲̪̇͋͝p̸̛̫̰̍͂̎ ̴͎̔M̷̯͂̉̌͘j̶̡̻̓g̶͎̯̦͈̀͐̏f̶̭̫̳̼̓͊ Since 1983 | Unlocked when beating every challenge, including Hell Mode. |
| Thank you! Poster | Thank you for playing! Come again soon! | 100% The Game. Find every secret, unlock every item,
unlock Good Night Difficulty in Endless Night, get $99999, and beat all of the challenges. |
| Creepster Toy | A Figure of Creepster | $358 |
| Metal? Poster | A poster of Metal Chris that will sometimes have Shadow Chris on it when you put up the cams | $3000 |
| Phantom Chris.Sal Plush | A Plushie of Phantom Chris.Sal | Beat Five Nights At Creepsters Mode |
| Major Chrome Tophat | Major Chrome's top hat | $2500 or if you can randomly find it on the cams and click it. |
| The Rasonette's Tie | The tie that Rasconette wore. | Unlocked by dying 5 times to Rasconette |
| Glitchy Suit. | A Glitching Suit propped up on the wall. | Beat Chaotic Challenge mode |
| Electro Sword | Bryces sword mounted on the wall | $2000 |
| Hunger Games Book | A Book of the hunger games. Can be clicked on once per night to make the chris characters weakened for 30 seconds. | $4000 |
| S.C Match Box | A Match box with Salvage Chris on it | Beat Class Attack Mode |
| Anthony Figure | A figure of anthony! | $1500 |
| W.I.P/Classic Nate Blueprints | Blueprints of W.I.P/ Classic Nate | You can Spot them rarely on the Cameras when you switch cams. Then you can buy them for $1000 |
| Frozen hat | A Night Guard hat in a ice block | Beat Crazy Kitchen Mode |
| Easy-Bake Oven | It's just an Easy-Bake oven. | Watch Undead Chef for the whole night |
| Family Photo | An old photo of Hinawa and Claus, being happy as mother and son. Oh, how it saddened me, when they both died. | $50 |
| Thomas Toy | A simple Thomas toy! What could possibly go wrong?? It activates THOMAS. | $1 |
| Hinawa Plush | A plush of Hinawa that Reincarnated Claus made. Pretty cute, huh? | $5 |
| Claus Plush | A plush of Claus that Reincarnated Claus also made. | $5 |
| Lucas Plush | A plush of Lucas that Reincarnated Claus yet also made. | $5 |
| Flint Plush | A plush of Flint that, well, you know the rest. | $5 |
| Vase of Sunflowers | A shiny, pink vase of pretty, beautiful sunflowers. | $30 |
| Innovation Trophy | A gift from Innovation, in form of a golden trophy. | Beat ‘Ready for the Innovation?’ 2 times |
| 90's music box | Those weird boxes that plays music seen in Jesters 90's themed diner | Beat 'Back to the 90's' mode. |
| Ethan Plushie | A Cute Plushie of Ethan! Appears in the Backstage on a table if unlocked. | $1000 |
| Lyra Plushie | A Cute Plushie of Lyra! Appears next to the Ethan Plush in the Backstage. | $1000 |
| Silver Plushie | A Cute Plushie of Silver! Appears next to the Lyra Plush in the Backstage. | $1000 |
| Kris Plushie | An Old, but still cute Plushie of Kris! Appears slightly hidden behind the Lyra Plushie in the Backstage. | Beat 'Johto Fun'. |
| Boo Mask | Replaces the Freddy Mask with a Boo Mask. | Beat 'A Random Jumble!'. |
| Kat and Ana Poster | A Poster of Kat and Ana that appears in the Game Area's left wall. | $800 |
| Rosa's Tiara | A Tiara that appears in your Office for display. It looks like Rosa's Tiara! | $6400 |
| Whole Cream Pie | One of Flippy's Whole Cream Pies. Appears in the Kitchen, on top of the oven. | $750 |
| Mayonnaise | Is MaYoNnAisE aN iNsTrUmEnT? (Appears in the Office, next to the fan.) | $9999 |
| Horseradish | hOrSeRaDiSh IsN't An InStRuMeNt, EiThER. (Appears in the Office, next to the fan.) | $9999 |
| Pikmin Pot | A Pot with a Red Pikmin inside. Appears in the Alleyway, next to a Dumpster. | $1500 |
| Doggo Head | A Head of a Doggo that appears in the Classic Show Stage's right wall. | $2000 |
| Capture Styler | A Capture Styler just like the one those Pokemon Rangers have! It will appear in your Office, on the fan. | $800 |
| Pokemon Ranger Plush Collection | A Cute Plushie of Lunick, Solana, Kellyn, Kate, Ben, and Summer that appear right below the Capture Disc! | Beat 'Ranger Danger'. |
| Bloody Knife | A Bloody Knife of... someone's. Let's just hope that blood is not real. Appears in one of the office cabinets. | $2500 |
| Hat Kid's Hat | A Hat of Hat Kid's... Looks like Fredbear's hat, to be honest! Appears in the office, next to the Right Door. | $1200 |
| Kalos Starter Plush Collection | Three adorable plushies of Fenniken, Froakie, and Chespin! Two sets of these plushies appear in the Left and Right Party Rooms, Alongside Calem/Serena. | $3000 |
| V A P O R W A V E S T A T U E | Every C in Pacific Ocean is pronounced differently. | Beat 'Weirdos'. |
| X Plush | he plush of X the Singer Reploid! | $6000 |
| Zero Plush | Plush of Zero the Guitarist Reploid! | $2500 |
| Alia Plush | Plush of Alia the Cooking Reploid, with her Plush cake! | $2500 |
| Axl Plush | Plush of Axl the Pirate Reploid! | $3500 |
| Praire Plush | Plush of Praire the Delivery Reploid, with her Plush Cyber cat! | $2500 |
| Layer Plush | Plush of Layer the Gift Reploid with mini Gift! | $6000 |
| Redbear 2.0 plush | The Plush of new and improved Redbear the Party Bear! | $4500 |
| White Rabbit 2.0 Plush | The Plush of new and improved White Rabbit the Banjo Rabbit! | $4500 |
| Spring X and Friends Plushes | "You will get the lovest plushies of X and Friends 1983!, Plush X the Black Rabbit, Zero the Red Bunny!, Axl the Singer Woman!, Redbear the Party Bear and White Rabbit the Banjo Rabbit!. | $15000 |
| Shadow X Plush | Wait...What kind of plush is this? | $50000 |
| Zombie’s Plush Collection and Cake. | Congrats you survived, we’ll give you cake! Along with some Plushies of the Gang! Zombie , Skelee , Creepy , Wesley , Nick and Piggy are sure to keep you asleep tonight! | Beat “If You survive,we’ll give you Cake!”. |
| Wesley’s Cuddle Plushie | A Chicken Plushie that cuddles you. Use this when the power goes out so you don’t go insane. | $7000 |
| Dry Bones Plush | Eye’s Will Glow to tell you if Dry Bones is near. | $10 |
| Red Koopa Plush | Eyes glow red if Red Koopa is near. | $10 |
| Green Koopa Plush | Eyes Glow Green if Green Koopa is near. | $10 |
| Chain Chomp Plush | This Plushie bark barks when Chain Chomp is running. | $10 |
| Golden Dry Bones Plush | Eyes glow red and blood stain under eyes appears if Golden Dry Bones is ready to attack. | Free |
| The Banana Splits' Helmet | The hat every member of the Banana Splits wears. | $20 |
| Bingo's Axe | The axe Bingo wields in The Banana Splits Movie Poster | $40 |
| The Banana Splits Movie Poster | The poster of The Banana Splits Movie | $60 |
| Boofie Sound Box | A actually helpful item. When clicked, it will drain 5% of your power, but it will lead Boofie, Tabby Slime, Funtime Foxy, Dawko and Rick away from your office and back to their starting positions. This can only be done 5 times. | Unlocked from beating the challenges "Just WHY" and "Cry" |
| Origin Sonic | Yes, you can buy a actual robot animatronic helper. Origin Sonic will guard either the left or right hall randomly per ingame hour, or he'll spin around when you close the camera, reseting your power to 100% | |
| Tails Plushie | A cute little Tails plush! Best to hug it when the power goes out. It also may help you in saving yourself somehow... | Given to you for free when you buy Tails from the Animatronic Lab. |
| The 'N-Word' Pass | I'm sorry. XD | $99999 |


sPresets Preset Name Characters Notes Are you ready?
- Freddy - 20
- Bonnie - 20
- Chica - 20
- Foxy - 20
- Golden Freddy - 20
- Endo-01 - 20
FNaF1 animatronics. New and Improved!
- Toy Freddy - 20
- Toy Bonnie - 20
- Toy Chica - 20
- Mangle - 20
- Balloon Boy - 20
- JJ - 20
- The Puppet - 20
- RWQFSFASXC - 20
Toy FNaF2 animatronics. Something Old
- Withered Freddy - 20
- Withered Bonnie - 20
- Withered Chica - 20
- Withered Foxy - 20
- Withered Golden Freddy - 20
- Endo-02 - 20
- Shadow Freddy - 20
Withered FNaF2 animatronics. Fright Night
- Springtrap - 20
- Phantom Freddy - 20
- Phantom Chica - 20
- Phantom Foxy - 20
- Phantom Mangle - 20
- Phantom BB - 20
- Phantom Puppet - 20
FNaF3 animatronics. Sweet Nightmares
- Nightmare Freddy - 20
- Nightmare Bonnie - 20
- Nightmare Chica - 20
- Nightmare Foxy - 20
- Plushtrap - 20
- Nightmare Fredbear - 20
- Nightmare - 20
FNaF4 animatronics. Trick or Treat
- Nightmare Freddy - 10
- Jack-O-Bonnie - 20
- Jack-O-Chica - 20
- Nightmare Mangle - 20
- Nightmare BB - 20
- Nightmarionne - 20
FNaF4 animatronics from the Halloween Update. Entertainment & Rental
- Baby - 20
- Bidybabs - 20
- Ballora - 20
- Minireenas - 20
- Funtime Freddy - 20
- Funtime Foxy - 20
- Ennard - 20
FNaFSL animatronics. Private Room Trials
- Bidybabs - 20
- Electrobab - 20
- Ballora - 20
- Minireenas - 20
- Funtime Freddy - 20
- Funtime Foxy - 20
- Lolbit - 20
- Yenndo - 20
- Bonnet - 20
FNaFSL Custom Night animatronics. Salvage What You Can.
- Scrap Baby - 20
- William Afton - 20
- Lefty - 20
- Molten Freddy - 20
FFPS main animatronics. Bottom of the Barrel
- Pan Stan - 20
- Bucket Bob - 20
- Mr. Hugs - 20
- No. 1 Crate - 20
- Mr. Can-do -20
- Happy Frog - 20
- Nedd Bear - 20
- Pigpatch - 20
- Mr. Hippo - 20
- Orville Elephant - 20
Trash and the Gang and Mediocre Melodies. Finest Quality
- Rockstar Freddy - 20
- Rockstar Bonnie - 20
- Rockstar Chica - 20
- Rockstar Foxy - 20
- Funtime Chica - 20
- El Chip - 20
- Music Man - 20
- Security Puppet
- Candy Cadet - 20
Rockstars Assemble and Posh Pizzeria. Back to the 90's
- Jester - 20
- Rally - 20
- Ally - 20
- Rabbit of the Shadows - 20
Three Days With Jester animatronics. Animatronica Returns!
- Adventure Endo-01 - 20
- Adventure Fredbear - 20
- Endoplush - 20
- Deedee - 20
- Mendo - 20
- Old Man Consequences - 20
- Lolbit - 10
FNaF World animatronics. Stay Freaky!
- Grand Dad - 20
- Steve - 20
- Red, Chuck, and Bomb - 20
- Scratch Cat - 20
- Knuckles - 20
- Granddy Dadbear - 20
- Sans and Papyrus - 20
- Gary - 20
- O Face - 20
- Freaky Fan - 20
- Freddy Fazbear - 20
- Withered Freddy - 20
- Springtrap - 20
- Nightmare Freddy - 20
- Funtime Freddy - 20
- Helpy - 20
FazbearFreak's Finest, as well as Faz's favorite character from each Freddy's game. Lincoln's Lads
- Freddy-5
- Bonnie-15
- Toy Freddy-20
- Toy Bonnie-20
- Mangle-20
- Withered Freddy-16
- Marionnette-15
- JJ-20
- Endo02-20
- Springtrap-1
- Nightmare Freddy-20
- Nightmare Chica-14
- Plushtrap-20
- Nightmare Fredbear-12
- Endoplush-20
- DeeDee-20
- Funtime Freddy-14
- Lolbit-20
- Bonnet-20
- Rockstar Bonnie-20
- Orville Elephant-20
- Happy Frog-15
- Music Man-20
- Lefty-20
LincolnDisaster19's fauvorite characters Ready for Freddy?
- Freddy Fazbear- 20
- Golden Freddy- 20
- Toy Freddy- 20
- Withered Freddy- 20
- Withered Golden Freddy- 15
- Shadow Freddy- 20
- Phantom Freddy- 20
- Nightmare Freddy- 20
- Nightmare Fredbear- 20
- Nightmare- 15
- Adventure Fredbear- 10
- Funtime Freddy and Bon-Bon- 15
- Yenndo- 5
- Molten Freddy- 20
- Lefty- 10
- Rockstar Freddy- 20
- Fredbear- 20
- Metal Freddy- 20
All Incarnations of Freddy/Fredbear Down the Rabbit Hole
- Bonnie- 20
- Toy Bonnie- 20
- Withered Bonnie- 20
- RWQFSFASXC- 20
- Springtrap- 20
- Nightmare Bonnie- 20
- Funtime Freddy and Bon-Bon- 20
- Bonnet- 20
- William Afton- 20
- Rockstar Bonnie- 20
All Incarnations of Bonnie/Springtrap Chicken Run
- Chica- 20
- Toy Chica- 20
- Withered Chica- 20
- Phantom Chica- 20
- Nightmare Chica- 20
- Rockstar Chica- 20
- Funtime Chica- 20
All Incarnations of Chica. Foxy Foxy
- Foxy- 20
- Mangle- 20
- Withered Foxy- 20
- Phantom Foxy- 20
- Nightmare Foxy- 20
- Nightmare Mangle- 20
- Funtime Foxy- 20
- Lolbit- 20
- Rockstar Foxy- 20
All Incarnations of Foxy/Mangle Slogan2's Roster
- Rick- 20
- Gary (Gadget Guy)- 20
- Destructo- 20
- Dark Gauntlet- 20
- Virtual Boy- 20
- Giegue- 20
- Foxy (THD)- 20
- Jenny- 20
- Star-Dream- 20
- SIN- 20
- Arcade Bunny- 20
- Sniper Joe- 20
- Pyramid- 20
- Vriska- 20
- Souldozer- 20
All of Slogan2's OC's. Experiments Gone Wrong
- Rick- 20
- Gary (Gadget Guy)- 10
- Destructo- 20
- EXM 01- 20
- The Insane Puppet- 20
- Lefty- 20
- Molten Freddy- 20
- XOR- ???
- All of the Nightmares- 20
- Shadow Freddy- 15
- Phone Guy- 10
- SEC-Strings- 15
- Simon- 8
- Star-Dream- 12
- SIN- 5
- Pyramid- 10
All of these are experiments made by William Afton, like the Nightmares and some of my/others OC's. The Forgotten Ones
- Withered Freddy- 20
- Withered Bonnie- 20
- Withered Chica- 20
- Withered Foxy- 20
- Withered Golden Freddy- 20
- Springtrap- 20
- Circus Baby- 20
- Ballora- 20
- Funtime Freddy and Bon-Bon- 20
- Funtime Foxy- 20
- Ennard- 20
- Yenndo- 20
- Scrap Baby- 20
- Molten Freddy- 20
- Scraptrap- 20
- Lefty- 20
- El Chip- 20
- Grand Dad- 20
- HIM- 20
- Destructo- 20
- The Virtual Boy- 20
- Simon- 20
- Souldozer- 20
- Kris - 20
♎︎■︎♓︎⬥︎■︎◆︎ ●︎●︎♓︎⬥︎ ♏︎❒︎◆︎⧫︎❒︎□︎⧫︎ ⬧︎♓︎♒︎⧫︎ ●︎●︎♋︎ Five nights at Creepsters
- Creepster-20
- Metal Chris + Shadow Chris-20
- Phantom Chris.Sal-20
The Five Nights At Creepsters creatures from All Stars wrapped up in one preset! Chaotic Challenge
- Major Chrome-20
- The Rasonette-20
- The ErRoR-20
The Five Nights At Hansen Enemies from All Stars are present in this Preset! Class Attack
- Bryce-20
- Ghost Simone-20
- Salvage Chris-20
Bryce, Ghost Simone and Salvage Chris arrive to torment another corrupt adult for this Preset. Crazy Kitchen
- Endothony-20
- W.I.P-20
- Brain Freeze-20
Endothony, W.I.P and Brain Freeze appear to scare in this Preset The Stone Age
- Clubber - 20
- Protector - 20
- Spear Thrower - 20
- Raptor - 20
- Stoner - 20
- Bone Mage - 20
- Chieftain - 20
- Raptor Rider - 20
- Mammoth - 20
All of the units from the Tribal Faction. A Random Jumble!
- Kat and Ana - 20
- Dawn - 20
- Boo - 15
- Rosa - 15
- Luigi - 10
- Squidward - 20
- Olimar - 15
- Flippy - 20
- Berry - 20
- Pete - 10
The Entire Cast from 'One Week of Randomness', as well as the Player Character from 'DSAF: Sister Location'. Johto Fun
- Ethan - 20
- Lyra - 20
- Kris - 20
- Silver - 20
The Player Characters and Rival of the videogames Pokemon GSC and HGSS. Ranger Danger
- Lunick - 20
- Solana - 20
- Kellyn - 20
- Kate - 20
- Ben - 20
- Summer - 20
All Player Characters from the Pokemon Ranger Trilogy. Children of Freddy's!
- X the Singer Reploid - 20
- Zero the Guitarist Reploid - 15
- Alia the Cooking Reploid - 15
- Axl the Pirate Reploid - 20
- Layer the Gift Reploid - 20
- Withered Spring X - 20
- Withered Spring Zero - 15
- Withered Spring Axl - 15
- Withered Redbear - 20
- Withered White Rabbit - 15
- SHADOW BEAR/Shadow X - 20
The Animatronics from Five nights at X! Weirdos
- Phone Guy - 20
- Adventure Endo-01 - 20
- Endoplush - 20
- Adventure Fredbear - 20
- Deedee - 20
- Mendo - 20
- Old Man Consqeuences - 20
- Yenndo - 20
- Lolbit - 20
- Bonnet - 20
- Electrobab - 20
- HandUnit - 20
- Bucket Bob - 20
- Mr. Can-do - 20
- Mr. Hugs - 20
- No. 1 Crate - 20
- Pan Stan - 20
- Music Man - 20
- XOR - 20
- Grand Dad - 20
- Steve - 20
- Red, Chuck, and Bomb - 20
- Scratch Cat - 20
- Sans and Papyrus - 20
- Freaky Fan - 20
- Flumpty Bumpty - 20
- Eyesuar - 20
- The Owl - 20
- Mustard & Ketchup - 20
- Gary the Gagdet Guy - 20
- The Virtual Boy - 20
- Foxy (THD) - 20
- Jenny the Teenage Robot - 20
- Star-Dream - 20
- Arcade Bunny - 20
- Pyramid - 20
- Souldozer - 20
- Zonic - 20
- Gorefield - 20
- Albert - 20
- Jayingee - 20
- Samuel - 20
- Su-Tart - 20
- Guest - 20
- Rust_010 - 20
- Box - 20
- White Box - 20
- Green Box - 20
- Crowbar - 20
- Kat and Ana - 20
- Flippy - 20
- Squidward - 20
- Olimar - 20
- Dawn - 20
- Rosa - 20
- Pete - 20
- Lunick - 20
- Solana - 20
- Hat Kid - 20
- Calem and Serena - 20
A Reference to the preset in Sister Location. If You Survive We’ll Give you Cake!
- Zack Zombie- 10
- Skelee Skeleton-20
- Creepy the Creeper-6
- Nick the Wither Skeleton-4
- Wesley-20
- Piggy Pigman-8
All Characters from Five Nights at Zombies. Cman’s Psychos!
- Freddy Fazbear-15
- Bonnie the Bunny-25
- Golden Freddy-20
- Phone Guy-25
- Toy Freddy-10
- The Mangle-15
- Withered Bonnie-15
- Shadow Freddy-5
- The Marionette-10
- Springtrap-15
- Nightmare Freddy-10
- Nightmare Bonnie-5
- Plushtrap-5
- Nightmare FredBear-10
- Nightmare-15
- Adventure Fredbear-10
- Dee Dee-15
- Baby-5
- Funtime Freddy-25
- Bonnet-5
- Ennard-10
- Scrap Baby-10
- Lefty-5
- ScrapTrap/Afton-10
- Mr. Hugs-1
- Mr. Hippo-15
- Rockstar Freddy-10
- Candy Cadet-10
- XOR(Can only summon Fredbear in this mode)-1
- Grand Dad-25
- Popgoes-5
- Stone the Crow-10
- Ignited Freddy-10
- Ignited Bonnie-30
- Ignited Foxy-5
- Ignited Golden Freddy-10
- Creation-30
- Ignited Springtrap-5
- Freddy Frostbear-5
- Cman-30
- THE MAN BEHIND THE SLAUGHTER-30
- Scrap Withered Bonnie-30
- Balloon Demon Child-30
Cman’s favorite characters and made up characters, and characters he made up himself. Cupcake Challenge
- Everyone- 5
A Reference to the preset in FNaF2. Fazbear Fever
- Everyone- 10
Reference to the preset in FNaF2. Golden Freddy
- Everyone- 20
Good Luck. You'll Need It.
Hell Mode
- Everyone- 50
Unlocked by finding the key and turning on the destroyed Dee Dee's Fishing World arcade machine. Can only be done on 20/20, and restarts your night when activated.
When activated however;
welcome to my special hell.
Maniac Mania
- Everyone - 100Unlocked by buying all of the plushies from the shop and Yosh, Unikitty and Tails from the Animatronic Lab.Creatures with Snearing Mouths
- Everyone - 150FNAF MEME REVIEWAHH
- Everyone - 200Note that two characters, Buff Helpy (I'M SORRY!) and Totem Panic are active. However, you won't know how to deal with them.The Banana Splits 1
- Fleegle - 50
- Bingo - 50
- Drooper - 50
- Snorky - 30
- Prototype Fleegle - 30
- Shadow Fleegle - 30
- SOUL - 20
- Glitched Drooper - 20
FNwTBS1 animatronics. The Banana Splits 2
- New Fleegle - 50
- New Bingo - 50
- New Drooper - 50
- New Snorky - 30
- Harmony - 30
- Burnt Fleegle - 30
- Burnt Bingo - 30
- Burnt Drooper - 30
- Burnt Snorky - 30
- 27' Prototype Fleegle - 30
- Floyd - 30
FNwTBS2 animatronics. Just WHY
- Boofie -10
- Tabby Slime - 5
- Funtime Foxy - 15
- Helpy - 20
- Rick - 25
- Springtrap - 30
- Freddy Frostbear - 35
- Dawko - 40
Main problems are Springtrap, Freddy Frostbear, Dawko, and, despite being slow, Tabby Slime. Beating this challenge and "Cry" unlocks Boofie Sound Box item in the the shop for free. Cry
- Boofie - 100
- Tabby Slime - 100
- Funtime Foxy - 100
- Helpy - 100
- Rick - 100
- Springtrap - 100
- Freddy Frostbear - 100
- Adventure Fredbear - 50
- Old Man Consiqinces - 200
- Flumpty - 100
- Creepy the Creeper - 100
- Freddy Fazbear - 150
- Dawko - 250
Just, AHHHHHHHHHHHHHHHHHHHH. You'll be screaming while playing. Not sorry Dawko, not sorry. :/ == New and Deadly 1
- Yoshi - 20
- Unikitty - 20
- Tails - 20
Only unlocked when you buy Yoshi, Unikitty and Tails from the Animatronic LabNew and Deadly 2
- Yoshi - 50
- Unikitty - 50
- Tails - 50
- Buff Helpy - 25
- Totem Panic - 25
This and "AHH" are the only two challenges were Endless Night== Endless Night is unlocked upon completing 3 Challenges. Upon entering Endless Night, the player must choose a difficulty level, which dictates how many 20-Difficulty Animatronics the player must activate. The player then chooses the Animatronics and must survive as long as possible. At least 25% of the selected animatronics must be able to directly kill the player through a jumpscare.
| Difficulty Level | Minimum Animatronic # |
| Super Easy | 3 |
| Easy | 5 |
| Normal | 7 |
| Intermediate | 10 |
| Hard | 12 |
| Super Hard | 15 |
| Expert | 17 |
| Impossible | 19 |
| Impossible-er | 22 |
| Impossible-er-er | 25 |
| Good Night | 30 |
Good Night is only unlocked upon surviving for a minute on Impossible-er-er Difficulty.
Trivia[]
- Every animatronic that appeared in the canon Ultimate Custom Night makes an appearance here, along with a few extras.
- Golden Freddy and Endo-01 are added from Five Nights at Freddy's 1.
- Withered Freddy, Withered Foxy, Endo-02, Shadow Freddy and RWQFSFASXC are added from Five Nights at Freddy's 2.
- Phantom Chica, Phantom Foxy and Phantom Puppet are added from Five Nights at Freddy's 3.
- Jack-O-Bonnie, Nightmare Chica, Nightmare Foxy and Plushtrap are added from Five Nights at Freddy's 4.
- More FNaF World reps are added, including the returning Adventure Endo-01 and also Adventure Fredbear, Endoplush, Deedee and Mendo.
- Funtime Freddy, Bidybabs, Minireenas, Bonnet, Electrobab, Yenndo and Lolbit are added from Five Nights at Freddy's: Sister Location.
- Trash and the Gang are separated into their own characters, and Security Puppet and the returning Candy Cadet is added from Freddy Fazbear's Pizzeria Simulator.
- The Shop mechanic returns from Factory Shift as a reward for beating nights and adding replay value.
- The Oxygen mechanic was based on the scrapped Toxicity Meter from Five Nights at Freddy's 2, which was later reused in Five Nights at Toy Fazbear's.
- Wesley running in the ceiling vents is a reference to how he does the same thing in Five Nights at Zombie’s.
- In the Game Area, there are three arcade cabinets. One labeled Deedee's Fishing World (where Deedee and Old Man Consequences appears), another labelled Chica's Party (where Phantom Chica appears) and another named Pizza Battle (as a reference to the game).
- There is also another Deedee's Fishing World hidden in the far corner of the Parts and Service that is hard to see, but it is grey and beaten up. Clicking on it without the key will make a beeping noise, and then blue-screen before the game crashes. Clicking on it with the key will show a picture of XOR hanging herself using Deedee's fishing rod. Clicking it again will play a distorted voice clip of Old Man Consequence saying "All Actions have Consequences," and unlock a secret "Hell Mode" where everyone is set to 50 difficulty. This only works on "Golden Freddy" mode. This also restarts your night to prevent people from using it at the last minute.
- The Shadow Plushies will rarely twitch or start to hover over your desk. Strange...
- The ??? item is something that is HEAVILY related to the FNaF Lore, but nobody has beaten Every Challenge yet, so we don't know what it is...
- It is rumored to be the chest but opened with Fredbear's head inside of it. Could also just be a troll item like the Golden Virtual Boy. We'll see...
- It's also rumored to be a bunch of voice recordings recorded by William Afton himself...
- Another persistent rumor says it's a bundle of Exotic Butters...
- Rick will rarely tell one of Candy Cadet's stories, but with him in it, saving the day.
- The Golden Bonnie Trophy lacks a Guitar, an odd design choice that is lampshaded by the item description.
- If you click on Foxy (THD)'s nose, it will make him scream "BREKFEST, DAD'E"
- When Nightmare Bonnie is about to attack, a sticky note with the Wi-Fi Password will inexplicably appear on the desk.
- Sometimes when The Puppet is active, you can hear a really faint bass-boosted Ali-A theme in the background.
- If Pyramid is active, there is a 1/100 chance that a giant and rusty sword will appear in your office. It cannot be used however.
- Some of the tunes that play on the Camera Kris is on is the New Bark Town theme, the Route 42-44 theme, and The Azalea Town/Blackthorn City Theme. There is a 1/100 chance that the HGSS versions of these themes can play, and an even lower 1/1000 chance that Lyra's or Ethan's theme from HGSS can play.
- Kris goes much, MUCH faster when Lyra successfully lowers the Player's Oxygen. Same with Ethan if Kris is able to get in the office and cover the door buttons.
- Skelee works similar to Ballora except instead of producing music , he produces loud stomping sounds.
- Wesley , Ballora , and Skelee have their location recorded through sounds.
- When Serena disables the door, Skelee will stop walking and then run straight at the door and can kill right before Calem if Skelee is active while Serena does this.
- When Creepy’s face appears in the right door, Cave sound 14 from Minecraft will play as a reference to the fact that Cave 14 has a creeper face in it’s spectrogram form.
- If Birthday Boy Blam and Skelee are active on the same night, Skelee will scare off Blam when he’s trying to get to the player. Talk about independent.
- Calem and Serena have a 1/5000 chance of jumpscaring the player if they press the
- X and Y keys.
- If You get killed by both Skelee and Nick (Get Skelee to disable the door and trigger Nick to run) a 8 bit cutscene plays where Nick infact Congratulates Skelee for helping him killing the guard. This is presumably because they were brothers before they died , and their brotherhood continues on in their life as animatronics.
| VentureSonic's pages | ||
|---|---|---|
| Apart of the Expanded Canon | Fredbear Legacy + FNaF Continuation | Fredbear Legacy: Fazbear Amusement ‣ Five Nights at Freddy's: Factory Shift ‣ Freddy Fazbear: Pizza Battle |
| Three Nights with Trash and the Gang | Three Nights with Trash and the Gang ‣ Many Nights with Mediocre Melodies | |
| Extra Games | One Night of Everything ‣ One Night of Everything 2 ‣ One Night of Everything World ‣ One Night of Everything: Ultimate Custom Night ‣ FNAF World: The Return to Animatronica | |
| Fazbear Platformer | Fazbear Platformer ‣ Fazbear Platformer 2 - Fighting Hybrid ‣ Fazbear Platformer 3 - Phantom Spirits ‣ Fazbear Platformer 4 - Nightmares and History | |
| Characters | Metal Freddy ‣ Trickster Pig ‣ Sharp the Wolf ‣ Alton Astor ‣ Purple Freddy | |